Read Something Out of Your Comfort Zone

I am an avid reader (who has been frustratingly without time for pleasure reading here recently.) With a wide range of interests, I have far too many options when it comes time to choose the next books to read. Even with this many options, I frequently find myself reading similar types of material. In order to stretch myself, I try to peruse different “foreign” sections occasionally.

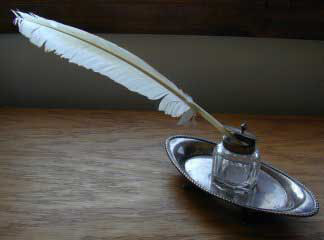
I am not a poetry reader (much less a writer… if I write it one should not be surprised when it starts with “roses are red, violets are blue”). However, sometimes an author or book will catch my eye and I’ll give it a try. Recently one did just that. After chasing the book down at the library I picked it up and have just begun reading it. For some reason, this poem caught my fancy.

Abecedary
By: Tom Disch
From: Yes, Let’s

A is an Apple, as everyone knows.
But B is a …. What do you suppose?
A Bible? A Barber? A Banquet? A Bank?
No, B is this Boat, the night that it sank.
C is its Captain, and D is its Dory,
While E – But first let me tell you a story.
There once was an Eagle exceedingly proud
Who thought it would fly, in the Form of a cloud —
Yes, E is for Eagle, and F is for Form,
And G is the Grass that got wet in the storm
When the cloud that the Egale unwisely became
Sprinkled our hero and all of his fame
Over ten acres of upland plateau.
So much for that story. Now H. Do you know?
H is the Hay that was made from the Grass,
And I’s the Idea of going to Mass,
Which is something that only a Catholic would do.
Jews go to Synagogue. J is a Jew.
K is for Kitchen as well as for Kiss,
While L is for all of the black Licorice
You can eat in an hour without feeling ill.
M is for Millipede, Millet, and Mill.
The first is an insect, the second a grain,
The third grinds the second: it’s hard to explain
Such a process to children who never have seen it —
So let’s go to the country right now! YEs, I mean it.
We’re leaving already, and N is the Night
We race through to reach it, while P is the Plight
Of the people (Remember?) who sailed in that Boat
That is still, by a miracle, somehow afloat!
(Oh dear, I’ve just noticed I’ve overlooked O:
O’s an Omission and really should go
In that hole – do you see it? – between N and P.
No? It’s not there now? Dear O, pardon me.)
Q is the Question of how far away
A person can travel in one single day,
And whether it’s worth it, or might it be better
To just stay at home and write someone a letter?
R’s are Relations, a regular swarm.
Now get out of the car – we’ve arrived at their farm!
S is the Sight of a Thanksgiving feast,
And T is the Turkey, which must weight at least
Thirty pounds. U is Utopia. V …
V simply Vanishes – where, we can’t see –
While W Waves from its Westernmost isle
And X lies exhausted, attempting to smile.
There are no letters left now but Y and then Z.
Y is for You, dear, and Z is for me.

—————————————–

Find something that is a bit out of your normal comfort zone and give it a try. You might just be pleasantly surprised by what you discover!

Creating a Clutter Free Desktop

I’ve got a lot going on right now, so I need to be able to focus. If you’ve spent any time around me, you know that I don’t do fixed focus and single-tasking very well. Indeed, as I write this I am sitting outside watching traffic go by, listening to the iPod and writing (all while avoiding studying for tomorrow’s exam). This is not my ideal productive state, though I do manage to get some quality work done in similar environments.

Every so often I head over to Leo Babauta’s Zen Habits and see what lifestyle goodness has been posted recently. The latest excursion resulted in a number of posts that I had to catch up on, including one on how to Create a Minimalist Computer Experience. Again, if you have ever seen me on a computer, I am anything but a minimalist. Right now I have three text documents open (one in notepad and two in Open Office’s Writer), one folder open (all 4 of those are for the studying I’m supposed to be doing), as well as three different instances of the Chrome web browser, with a total of 36 tabs open between them.

Up until about 10 minutes ago, my computer’s desktop was cluttered with icons, notes written to myself, todo lists, etc. I followed some of the directions in Leo’s post and immediately felt better. I took a few minutes to sort through the stuff that I had on my desktop; all but 4 of them were either combined, moved, or deleted. Of these 5, one will remain (the recycle bin) and the other 3 are the task lists for projects that I am currently working on.

While I loved my background photo (you can see it here under the “something feathery” category), not only was it quite busy but I’ve also had it for awhile now and was in the mood to change. (I have a small collection of potential background photos, just for when I want to switch it up a bit.) My new background is much more simple and relaxing.

I prefer to leave my start bar legible, because of the clock in the bottom right corner. I like a minimal number of programs running, and consider widgets to be programs. I already had some short cuts implemented, and have been using them for years now, so that advice was nothing new to me.

I haven’t taken the leap of letting Google Desktop index my computer. While I’m sure it would be handy, I just haven’t seen the need. I guess it’s just not my style.

That’s where I’m at thus far. I spent about 10 minutes making my desktop less cluttered, which immediately helped me relax a little. Because of that I can now focus on the tasks at hand and get some important things taken care of. Now I need to make myself study, and then I can spend focus on knocking out some of those tabs… cause I really do have too many open. 😀

Take a Break

Sometimes you just need to take a break. Stop. Recharge.

Our hectic exam schedule (mentioned here) is nearly done, and we are going to celebrate tonight. No studying, no books, no work. We’re just going to relax, enjoy each others’ company and do nothing.

Do you need to take a break? Perhaps your fuse is getting a bit short, you find yourself disgruntled with part of your life, or everything just seems to be going by too fast. If so, you might be in need of a break.

Your break does not have to be a weekend road trip. It simply needs to be some time taken just for you, doing something that relaxes you. You might want to take a few hours to focus on your hobby, go for a hike, or simply take a nice hot bath with a good book. Whatever you choose, don’t worry about upcoming tasks. They will be waiting when you return, renewed and with more energy.

Take a break. Stop. Recharge!

Upgrade Your Daily Tasks

Quill Pen Do you have tasks that you have to complete on a daily basis? Do you see them as boring, mundane tasks? You can make them more exciting.

This isn’t a post telling you to change your mindset, or your attitude. I’ll leave that to those who are better qualified. This post outlines a simple method to upgrade your daily tasks from mundane to interesting, if not flat-out exciting.

Let’s take writing as an example. We all have to write, even if it is just to make out a grocery list or jot down a phone number. This oft-done chore can be seen as nothing more than that. However, with a simple upgrade in my materials, I have turned writing down any mundane piece of information into a pleasure.

-que lights & music- Enter the fountain pen. No, I’m not using a quill as seen in the above photo (though once I find a suitable feather, I do plan on making one). I purchased a $5.99 Pilot Plumix from Target (you can see it below). It was a cheap and quick upgrade for my everyday writing requirements. Exactly what I needed.

Quill Pen

This little pen has injected some excitement into my writing. It doesn’t matter if I am making out a todo list (of which I have many), taking inventory at work or writing a note for my wife, I enjoy the writing process. I try not to write as fast so that I can enjoy what I am doing, which has also pleasing side-effect of improving the legibility of my handwriting.

While doing research into the various pens that are out there, I have stumbled across various examples of others’ handwriting. Some of these are absolutely gorgeous! They have inspired me to work on consciously improving my script as well. I have long wanted to do so, but never wanted to sit down and do the necessary work. Now that I look forward to writing, spending time doing drills will not be so bad, and will ultimately help me enjoy the process even further.

What can you upgrade in your daily life to make it seem like less of a chore? Maybe fountain pens aren’t your thing (I tried a rollerball pen the other day and loved it!). Perhaps a new kitchen knife that better fits your hand would help you enjoy prepping food when cooking, or a more comfortable seat would make you more inclined to ride your bicycle. Pay attention as you go about your tasks today and see what you don’t like to do. Whatever it is, determine why you don’t like it and see how you can upgrade your tasks!

Photo Scavenger Hunt – Redeveloped!

Nicole has announced another photo scavenger hunt, so I thought I’d jump in again. I definitely enjoyed the last one and expect this one to be just as good.

What is a Photo Scavenger Hunt?
For you new readers, a photo scavenger hunt is exactly what it sounds like; a scavenger hunt where, instead of bringing back the item, you take a photo of it. Of course, this means that it can be more flexible than a traditional scavenger hunt. I can’t very well carry a tiger around with me, but if it’s on the list, I can take a photo of one (from a safe distance).

The List:
I will be adding photos as I take them (Click on photos to see them full-sized).

  1. Souvenir – The mugs have characters from the Finnish children’t story, Moomin, and were a gift from the neighbors. The glassware was a wedding present, it is from a Finnish design company, Marimekko.
    [singlepic id=104 w=320 h=240 float=none]
  2. Fish
  3. Religious Building – This tiny building is located inside the cemetery.
    [singlepic id=101 w=320 h=240 float=none]
  4. Fire Department
    [singlepic id=98 w=320 h=240 float=none]
  5. Manhole Cover
  6. Post Card
  7. Water
    [singlepic id=107 w=320 h=240 float=none]
  8. Communication Device
  9. Life Event
  10. Foreign Stamp
  11. Tree – This is my wife’s favorite tree. Of course, it was windy when we came to photograph it. We might return and try again on a less-windy day.
    [singlepic id=105 w=320 h=240 float=none]
  12. Living Space of Non-Human – at least it used to be.
    [singlepic id=102 w=320 h=240 float=none]
  13. Street Mirror
  14. Decoration Fixed on a House
  15. Foreign Flag
  16. Fire – I love my little can stove! The tea-pot fits perfectly upon it.
    [singlepic id=99 w=320 h=240 float=none]
  17. Antenna – This is just a cool-looking antenna that I had never noticed before.
    [singlepic id=96 w=320 h=240 float=none]
  18. Phone Booth
    [singlepic id=100 w=320 h=240 float=none]
  19. “Verboten” Sign
    [singlepic id=106 w=320 h=240 float=none]
  20. Beach
  21. Cityscape
  22. Something Goofy
  23. Something Carved
    [singlepic id=97 w=320 h=240 float=none]
  24. Eye
  25. Something Rural
    [singlepic id=103 w=320 h=240 float=none]

Watch the Sunrise

Just like a sunset, sunrises provide an opportunity to see one of nature’s most frequent wonders. Watching the sun rise can give you a sense of fresh beginnings and is a wonderful way to start the day. It requires a bit of planning, however.

You need to know:

  • what time the sun comes up
  • a good place to watch the sunrise
  • how long it takes to get to your viewing point

A sunrise actually begins about 15 minutes before you can see the sun. The sky starts to change colors, objects begin to take shape, the world unfolds. If you don’t time it right, you will miss out on the best part of the sunrise. This is why you need to know how long it takes to get to your viewing spot, you don’t want to be en route and miss the best part!

Plan on watching tomorrow’s sunrise. Pick your spot, check the times and set your alarm!

Chase a Sunset

How often do you take the time to really appreciate a beautiful sunset? Do you do more than look for a few seconds and comment/think how beautiful it is before you continue whatever you were doing? This is something that I often have a hard time with and am trying to work on.

I have heard that sunsets are like snowflakes, no two are alike. When you start to pay attention, it is easy to see that this is true. The clouds are different, the coloration is more or less vivid, the horizon changes depending on your location. However, if you don’t take the time to really look, you might never appreciate this fact. “It’s a sunset, look at the pretty colors” and move on…

Today’s challenge is two-part:

  1. When you see a sunset, “chase it down”
  2. Really take time time to appreciate a sunset

Chase it down by finding the best vantage point to view the sunset. This might be as simple as walking around a building or to the side of some trees so that you have a better view. It could mean getting in the car and driving to a nearby hill.

Appreciate the sunset by taking 10 or 15 minutes to really watch it. Pay attention to the changing colors of the clouds, how the silhouetted trees/buildings change from a purple to black, to the fading color of the sky. Don’t forget that the sky continues to change even after the sun is out of sight.

This evening, pay attention. I want to hear about your sunset views in the comments!

Take Up An Old Challenge

Rubix Cube 
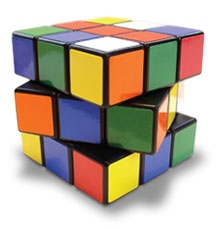
Do you remember these things? I had one when I was younger and finally, out of frustration, put it back together by peeling off the stickers and putting them where they needed to be.

Recently, I decided that I wanted to finally “beat” this toy and requested one for Christmas. “It will be a good way to pass time during my flight to Ireland,” I thought. I struggled with it for some time before giving up, frustrated once again, and tucking it back into my carry-on bag. After arriving in Ireland, I placed the mixed-up cube on my desk. After seeing it every day for 3 months, I decided to take up the challenge once again. With some help from the good ole internet, I quickly discovered that there are many ways to solve the cube and set about learning one of them.

You might see this as cheating (I did initially), but I am pleased with the results. I learned from others and applied this information to my own situation. My cube has been solved a number of times now. I still have some trouble remembering the final steps required, but I only started practicing over the past weekend and have not yet focused on those steps.

What un-beaten challenges do you still have? This can be anything that you want to do but have never completed. Is there a book you always wanted to read, a race you want to run or a daytrip you want to take? What are you waiting for, go do it! Don’t make excuses! How long have you been making excuses and have not completed your challenge? You don’t want that to continue…

Many challenges don’t have to be finished in one setting. Work on it during your lunch break. 15 minutes a day quickly adds up. Do one small task/part every day and you will be amazed at how quickly you finish.

Start right now! Take the initial step right now. Determine the dates for your race (giving you a deadline to work towards), order that puzzle or book you have never completed, or make a list of equipment you might need on your day trip. Don’t make excuses and keep working toward beating that old challenge!

Reach Out to Someone

What do you do when you are driving aroudn town on your tractor, can’t find your friends, and are bored? If you are a particular young Finnish man*, you call the local radio station and try to talk your way into a free prize. There are no contests going on, no give-aways currently taking place, nothing free available. You call and tell tham that you are bored and would like to win something, perhaps if you tell a good enough story or sing a good enough song. Sometimes it even works.

I have to admit that this had never occurred to me. While I do not even have access to a tractor, I still find myself bored at times. The radio contests are never conveniently timed for meö it never occurred to me to make my own.

Are you not comfortable calling up a stranger? Instead of calling a radio station, you can call someone you know but have not spoken to in some time: perhaps a friend you have fallen out of touch with or a family member that you have not spoken to recently.

* Not all young Finns drive around town on their tractors. In fact, this is the only tractor you will see driving around the city. This particular young man does not yet have his driver’s license (he’s only 17 and you cannot test for it until 18) and drives a tractor for his job. He is allowed to drive it around during his off-hours and takes full advantage of this opportunity.

Free Ultra-Light Camping Stove

I have at least 6 camping stoves, collected over the years (or hand-me-downs). Two of them see frequent use while the others sit in storage, forgotten. And yet I want even more. I visit every camping section I can and check out the stoves, seeing what the next “must have” is. I finally found a way to satisfy this itch without breaking my already cracked piggy bank.

Alcohol Stoves

Alcohol fumes are flammable. Vaporized alcohol (in gas form) is more flammable. These two simple facts are the guiding principles behind alcohol stoves. Pour the alcohol (fuel) into an alcohol stove. The fumes are lit, which causes the liquid to heat up and then begin to boil. Boiling vaporizes the liquid and causes the flames to burn at a hotter temperature.

Make Your Own!

There are many designs for alcohol stoves, designed to work better in different circumstances or be easier to build. This one is my current favorite, as it is easy to build, does not require a pot-stand and best of all, the materials are free! I have made this one using only my Swiss Army Knife and P-38. This means that if something happens to it during a camping trip, I can make a new one on the spot.

Materials

  • 1 aluminum soda can

Tools

  • cutting tool (sharp knife, scissors, razor blade)
  • pointy tool (push-pin, nail, ice pick)
  • marking tool (permanent parker)
  • measuring tool (ruler, tape measure)
  • smoothing tool (file, sand paper)
  • opening tool (can opener)
  • safety tools (gloves & safety goggles)

Disclaimer
You will be using sharp objects to make something that contains flammable liquids & burns… Be careful! I am in no way responsible for any injuries you inflict upon yourself.

Directions

  1. Prepare an aluminum soda can by emptying it’s contents and then rinsing it out thoroughly. (Here comes the free part!) Not a big soda drinker, I picked up enough cans walking down the road to make more stoves than I could ever possibly use. (I am sure to wash them out very well, and the flames take care of the rest!)
    If you would like a “prettier” stove, simply sand the paint off of the can. The easiest way that I have found to do this is to sand it off before the can is opened, so the pressure inside gives you something to push against. Since I am using pre-emptied cans, I have thought about filling it with water and then freezing it, but have not yet tried this method.
  2. Using your pointy tool (I prefer a push pin, though I’ve used the can opener on my Swiss Army Knife), poke 4 SMALL holes in the upper lip of your can, spaced every 90 degrees. These will allow the fuel to flow evenly while burning.
    They didn’t show up really well in the photos I took, but you want the holes evenly spaced around the rim of the can. I used the pushpin in the photo to make my holes, after marking their spots with the marker.
  3. Using your opening tool (can opener from kitchen or P-38), remove the inside top of the can. This stage can be a bit tricky and involve wiggling the opening tool to get a good bite. Be careful about burrs and sharp edges!
  4. Use the handle of your cutting tool to flatten/remove any burrs made by the pointy and opening tools.
  5. Draw a circle around the can 1″ from the bottom. Draw another circle around the can 2″ from the top. (This involves both the marking and measuring tools!) Generally, I lay the marker on a book to achieve the proper height, then spin the can to get an even ring drawn on it. Make sure your can stays flat the whole time, or your circle will look funny!
    Don’t forget to flip the can over when you are measuring the 2″ from the top, otherwise you will end up with a funny drawing on your can when you just measure 1″ and then 2″ from the bottom.
  6. Cut in-between these two lines. It can be messy, as you are in-between the lines.
  7. Cut the bottom line. It doesn’t have to be level, but it does need to be nice and smooth. (Some find this to be easiest with scissors, though I generally use my pocket knife.) Make sure there are no nicks or slivers to injure yourself on!
  8. Cut the top line. Again, it needs to be nice and smooth, and this time it needs to be level as well since this is what your pot will be sitting on.
  9. Use your smoothing tool, smooth away any slivers and burrs that might exist.
  10. Make a “wrinkle” or “dent” in the top portion, from the bottom edge up to the beginning of the upper lip. Be careful not to crease the can! You can use needle-nosed pliers, a pen or a dowel. I use my fingers, since I always have them handy! You don’t want these wrinkles to be too big or two wide. Be careful not to crease the can.
  11. Make 5-7 more of these wrinkles.
  12. Carefully insert the top portion INTO the bottom portion.

CONGRATULATIONS!

You just made an alcohol stove! Now let’s put it to use…

  1. Only use OUTSIDE, on a level surface, in safe conditions. Do not leave unattended!
  2. Pour fuel (70% Isopropyl Alcohol) so that it just covers the dome in the bottom of the can.
  3. Be sure no fuel is on your hands.
  4. Light using a long match or a long BBQ lighter.
  5. Wait for the outside edges to start flaming (you’ll know it when you see it!) Normally between 15-30 seconds.
  6. The first time you use the stove, just let it burn itself out, without a pot on it. The plastic in the paint needs to be burned off.
  7. Let the stove cool completely before refilling it.
  8. When re-lit, place pot carefully on the stove, making sure that it is centered.
  9. DO NOT STIR your pot when it is on top of the stove, as it is very easy to overturn this stove. That would pour flaming liquid everywhere… never a good idea.
  10. To put out the stove, either place an upside-down can over it to cut off oxygen, or simply wait for it to burn itself out. If you have a pot on top of the stove, you can sometimes blow the flame out.

Fuel

Just where does one get this magical liquid that makes this whole project possible? Any number of places, actually… You can use HEET from a gas station, denatured alcohol from the paint section of a hardware store (I bought mine at Wal-Mart), or any number of other fuels. Drinking alcohol works well, but costs a bit more. Check out www.zenstoves.net for even more information about fuel and other types of stoves that you can make.