Dear Readers

Adventure-Some.com has been live for over 3.5 months now. It has over 70 posts, 5 pages and a steady number of readers.

The question now is, where do you want this site to go? I enjoy running this site, but ultimately, it is written for YOU. Here’s you chance to influence the future of the site.

    4 questions to consider:

  1. Do you like what I’m writing, and if not what about it don’t you like?
  2. What topics do you want to see covered? (completely different subjects or more of the same?)
  3. Do you want more in-depth information? (do you prefer shorter or longer posts?)
  4. Should I continue focusing on the small adventures that you can have in your everyday life, or should I move my focus to the bigger adventures that take more time?

Please let me know what you think. Good, bad, indifferent; I want to hear it all. You can email me, message me on Twitter @FrenchHolt, or leave me a comment after this post.

Some Sort of Altar – Photo

A short distance from the caves is a natural “altar” that my wife and I stumbled upon. When you’re walking along the trail below the cliff and look up, it can be a bit of a shock to see this formation and wonder who built it (too many viewings of The Blair Witch, I suppose). After a few moments, you realize that it is just how the trees fell onto one another.

Click to see full-sized.

[singlepic=59,320,240,,center]

Take Up An Old Challenge

Rubix Cube Do you remember these things? I had one when I was younger and finally, out of frustration, put it back together by peeling off the stickers and putting them where they needed to be.

Recently, I decided that I wanted to finally “beat” this toy and requested one for Christmas. “It will be a good way to pass time during my flight to Ireland,” I thought. I struggled with it for some time before giving up, frustrated once again, and tucking it back into my carry-on bag. After arriving in Ireland, I placed the mixed-up cube on my desk. After seeing it every day for 3 months, I decided to take up the challenge once again. With some help from the good ole internet, I quickly discovered that there are many ways to solve the cube and set about learning one of them.

You might see this as cheating (I did initially), but I am pleased with the results. I learned from others and applied this information to my own situation. My cube has been solved a number of times now. I still have some trouble remembering the final steps required, but I only started practicing over the past weekend and have not yet focused on those steps.

What un-beaten challenges do you still have? This can be anything that you want to do but have never completed. Is there a book you always wanted to read, a race you want to run or a daytrip you want to take? What are you waiting for, go do it! Don’t make excuses! How long have you been making excuses and have not completed your challenge? You don’t want that to continue…

Many challenges don’t have to be finished in one setting. Work on it during your lunch break. 15 minutes a day quickly adds up. Do one small task/part every day and you will be amazed at how quickly you finish.

Start right now! Take the initial step right now. Determine the dates for your race (giving you a deadline to work towards), order that puzzle or book you have never completed, or make a list of equipment you might need on your day trip. Don’t make excuses and keep working toward beating that old challenge!

The Cliff is Looking Back! – Photo

Here are the caves that I mentioned. My wife and I climbed down the cliff (it’s not too hard, there’s a trail off to the side) and were surprised to discover that the cliff was looking at us! You can see, in the lower left corner, my wife is looking right back! 😀
It didn’t take us long to use that home-made ladder to get up into the cave to explore. They don’t go very far back… It’s as if some giant with an ice-cream scooper scooped out some of the stone. Interesting, no?

Click to see full-sized.

[singlepic id=64 w=320 h=240 float=center]

Reach Out to Someone

What do you do when you are driving aroudn town on your tractor, can’t find your friends, and are bored? If you are a particular young Finnish man*, you call the local radio station and try to talk your way into a free prize. There are no contests going on, no give-aways currently taking place, nothing free available. You call and tell tham that you are bored and would like to win something, perhaps if you tell a good enough story or sing a good enough song. Sometimes it even works.

I have to admit that this had never occurred to me. While I do not even have access to a tractor, I still find myself bored at times. The radio contests are never conveniently timed for meö it never occurred to me to make my own.

Are you not comfortable calling up a stranger? Instead of calling a radio station, you can call someone you know but have not spoken to in some time: perhaps a friend you have fallen out of touch with or a family member that you have not spoken to recently.

* Not all young Finns drive around town on their tractors. In fact, this is the only tractor you will see driving around the city. This particular young man does not yet have his driver’s license (he’s only 17 and you cannot test for it until 18) and drives a tractor for his job. He is allowed to drive it around during his off-hours and takes full advantage of this opportunity.

On Top of the World! – Photo

There’s no feeling that quite compares to standing on top of the world! No, not Everest, a cliff in the Red River Gorge (hey, the air is quite breathable and it’s above freezing… what can we say?) There are grooves in the stone where rappeller’s ropes have worn it away. Below us are some ice-cream scoop caves. For now, though, we are standing here on the edge, enjoying the view down down in the valley. We timed the changing of the leaves just right. A week earlier, and they were dull and dusty. A week later and they had started to fall.

over cliff

Free Ultra-Light Camping Stove

I have at least 6 camping stoves, collected over the years (or hand-me-downs). Two of them see frequent use while the others sit in storage, forgotten. And yet I want even more. I visit every camping section I can and check out the stoves, seeing what the next “must have” is. I finally found a way to satisfy this itch without breaking my already cracked piggy bank.

Alcohol Stoves

Alcohol fumes are flammable. Vaporized alcohol (in gas form) is more flammable. These two simple facts are the guiding principles behind alcohol stoves. Pour the alcohol (fuel) into an alcohol stove. The fumes are lit, which causes the liquid to heat up and then begin to boil. Boiling vaporizes the liquid and causes the flames to burn at a hotter temperature.

Make Your Own!

There are many designs for alcohol stoves, designed to work better in different circumstances or be easier to build. This one is my current favorite, as it is easy to build, does not require a pot-stand and best of all, the materials are free! I have made this one using only my Swiss Army Knife and P-38. This means that if something happens to it during a camping trip, I can make a new one on the spot.

Materials

  • 1 aluminum soda can

Tools

  • cutting tool (sharp knife, scissors, razor blade)
  • pointy tool (push-pin, nail, ice pick)
  • marking tool (permanent parker)
  • measuring tool (ruler, tape measure)
  • smoothing tool (file, sand paper)
  • opening tool (can opener)
  • safety tools (gloves & safety goggles)

Disclaimer
You will be using sharp objects to make something that contains flammable liquids & burns… Be careful! I am in no way responsible for any injuries you inflict upon yourself.

Directions

  1. Prepare an aluminum soda can by emptying it’s contents and then rinsing it out thoroughly. (Here comes the free part!) Not a big soda drinker, I picked up enough cans walking down the road to make more stoves than I could ever possibly use. (I am sure to wash them out very well, and the flames take care of the rest!)
    If you would like a “prettier” stove, simply sand the paint off of the can. The easiest way that I have found to do this is to sand it off before the can is opened, so the pressure inside gives you something to push against. Since I am using pre-emptied cans, I have thought about filling it with water and then freezing it, but have not yet tried this method.
  2. Using your pointy tool (I prefer a push pin, though I’ve used the can opener on my Swiss Army Knife), poke 4 SMALL holes in the upper lip of your can, spaced every 90 degrees. These will allow the fuel to flow evenly while burning.
    They didn’t show up really well in the photos I took, but you want the holes evenly spaced around the rim of the can. I used the pushpin in the photo to make my holes, after marking their spots with the marker.
  3. Using your opening tool (can opener from kitchen or P-38), remove the inside top of the can. This stage can be a bit tricky and involve wiggling the opening tool to get a good bite. Be careful about burrs and sharp edges!
  4. Use the handle of your cutting tool to flatten/remove any burrs made by the pointy and opening tools.
  5. Draw a circle around the can 1″ from the bottom. Draw another circle around the can 2″ from the top. (This involves both the marking and measuring tools!) Generally, I lay the marker on a book to achieve the proper height, then spin the can to get an even ring drawn on it. Make sure your can stays flat the whole time, or your circle will look funny!
    Don’t forget to flip the can over when you are measuring the 2″ from the top, otherwise you will end up with a funny drawing on your can when you just measure 1″ and then 2″ from the bottom.
  6. Cut in-between these two lines. It can be messy, as you are in-between the lines.
  7. Cut the bottom line. It doesn’t have to be level, but it does need to be nice and smooth. (Some find this to be easiest with scissors, though I generally use my pocket knife.) Make sure there are no nicks or slivers to injure yourself on!
  8. Cut the top line. Again, it needs to be nice and smooth, and this time it needs to be level as well since this is what your pot will be sitting on.
  9. Use your smoothing tool, smooth away any slivers and burrs that might exist.
  10. Make a “wrinkle” or “dent” in the top portion, from the bottom edge up to the beginning of the upper lip. Be careful not to crease the can! You can use needle-nosed pliers, a pen or a dowel. I use my fingers, since I always have them handy! You don’t want these wrinkles to be too big or two wide. Be careful not to crease the can.
  11. Make 5-7 more of these wrinkles.
  12. Carefully insert the top portion INTO the bottom portion.

CONGRATULATIONS!

You just made an alcohol stove! Now let’s put it to use…

  1. Only use OUTSIDE, on a level surface, in safe conditions. Do not leave unattended!
  2. Pour fuel (70% Isopropyl Alcohol) so that it just covers the dome in the bottom of the can.
  3. Be sure no fuel is on your hands.
  4. Light using a long match or a long BBQ lighter.
  5. Wait for the outside edges to start flaming (you’ll know it when you see it!) Normally between 15-30 seconds.
  6. The first time you use the stove, just let it burn itself out, without a pot on it. The plastic in the paint needs to be burned off.
  7. Let the stove cool completely before refilling it.
  8. When re-lit, place pot carefully on the stove, making sure that it is centered.
  9. DO NOT STIR your pot when it is on top of the stove, as it is very easy to overturn this stove. That would pour flaming liquid everywhere… never a good idea.
  10. To put out the stove, either place an upside-down can over it to cut off oxygen, or simply wait for it to burn itself out. If you have a pot on top of the stove, you can sometimes blow the flame out.

Fuel

Just where does one get this magical liquid that makes this whole project possible? Any number of places, actually… You can use HEET from a gas station, denatured alcohol from the paint section of a hardware store (I bought mine at Wal-Mart), or any number of other fuels. Drinking alcohol works well, but costs a bit more. Check out www.zenstoves.net for even more information about fuel and other types of stoves that you can make.

Surprise View – Photo

We camped beside this field on our first-ever trip to the Red River Gorge. Of course, by the time we quit exploring and actually picked somewhere to camp, it was nearly dark and we were rushing to set everything up. The next morning, imagine our delight when we discovered the view!

Tucked underneath the trees on the right side of the field (as you’re looking at it) is enough flat space for a number of tents. This spot is only a short distance from parking at the trail-head. There is a pond near-by as an easy water source for those with filters. When the season is right, there are even some blackberries in the field, just off the trail. If we ever return with a group, this is one of the places we will head to first. We love this view and often swing by just to see how it looks.

Click to see full-sized.

[singlepic=81,320,240,,center]

What’s Been Going On: Site Update

I’ve been working hard in the background, trying to improve the site. Some of the changes might have slipped in un-noticed, and I wanted to take some time to draw your attention to them.

Mascot

Have you seen this guy? He hikes across your screen at least twice every time you come here and visit. He likes the shade provided by the tree up in the header, and also hangs out on the right side of the screen. While hanging out there, he’s trying to help me out. It does cost me to keep this site up and running, and I would like for it to at least support itself. You can help me out by clicking on this guy when you see him and donating a bit of pocket change.
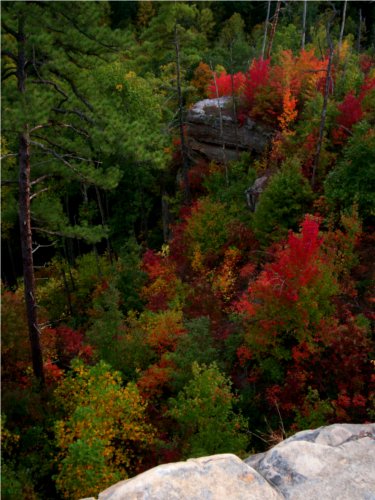
More posts!

Have you noticed the extra posts every week? That’s right! I’ve upped the ante. My recent venture into photography (as seen here and here) has provided me with more material that I want to share with you. I will be posting three pictures each week, in addition to the three weekly posts. You can follow along as I go adventuring, see how I grow as a photographer (which would be helped by critiques) and simply enjoy the views!

Better Company

As I’ve spent more time searching for fellow adventurers, I have been updating my links. I only want to provide you with the best for inspiration, and my links have changed to reflect that. Take a few minutes, head on over and visit these folks, and see where they might lead you!

Theme Re-design

-Smacks forehead- Oh yeah, how could I forget! Everything just changed! Well, not everything. Ok, not a whole lot, actually. I added a third column over on the left of the page so that I can include some advertisements (back to the whole site-support-itself thing). While doing that I tried to neaten up the right column and make everything look a bit more tidy. Placed the search bar at the top of the page, placed the RSS feed (Just click to sign up!) in the header and generally organized things a little better. All of you RSS and email subscribers might have missed out on this one, so you might come and visit to check it out!


That’s all I’ve got for now, but I’ve got more things that I am working on. If there is anything that you would like to see, please let me know in the comments!
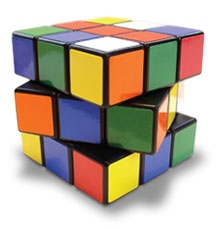