10 Days on the Wonderland Trail – Part 2: The Itinerary and Trail Report

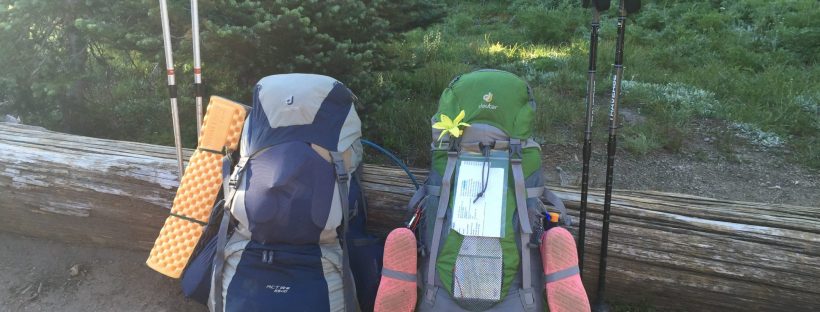
Our last post explained the logistics and preparation of our Wonderland journey, so now on to the good stuff, the actual trip and daily notes we took along the way.

Day 0
From Bremerton to White River Entrance
Ranger Jonathan at the White River Backcountry Information Center got us a permit on the 1st try at 2pm. Matthew motorcycled to Longmire to drop off our food cache and got there just before closing time at 4:59 pm. We overnighted at White River Campground which was super convienient because we start the trail tomorrow at the White River trailhead a few hundred feet away.

Day 1
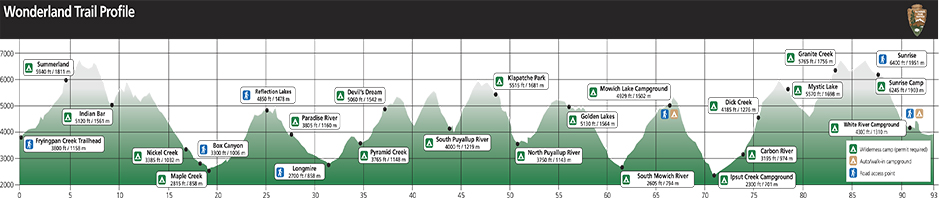
White River Campground Trailhead to Granite Creek Camp (8 mi)
It was a short day and we arrived in camp at about 12:30 pm. It was a good way to start out, an uphill climb most of the day so a good way to break in and get our legs used to climbing. We were assigned to the group site and had a pit toilet and bear pole all to ourselves. We heard from another group that tonight was accidentally overbooked (apparently the permit admission system had been glitchy) so we might end up having to share sites. We took a nap and woke up to some neighbors in our camp site, which was fine with us, there was plenty of space and we were just happy to be on the trail. Clear skies today gave us some views of Rainier from the Sunset area of the Park.
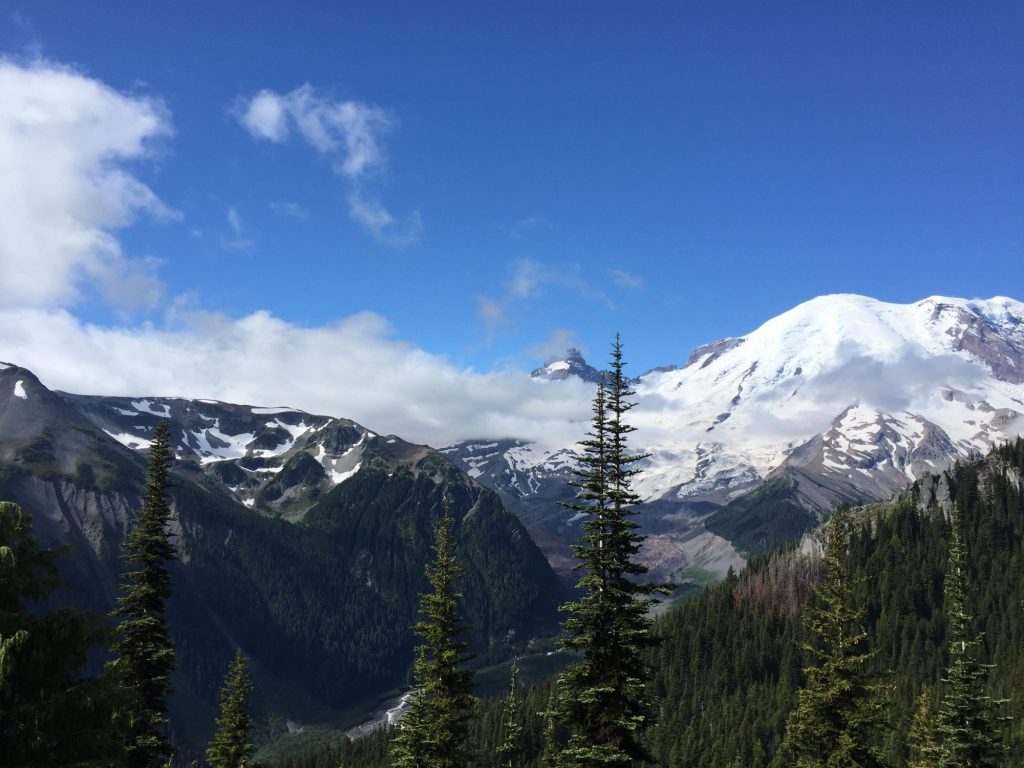
2016-08-09 09.51.01

Day 2
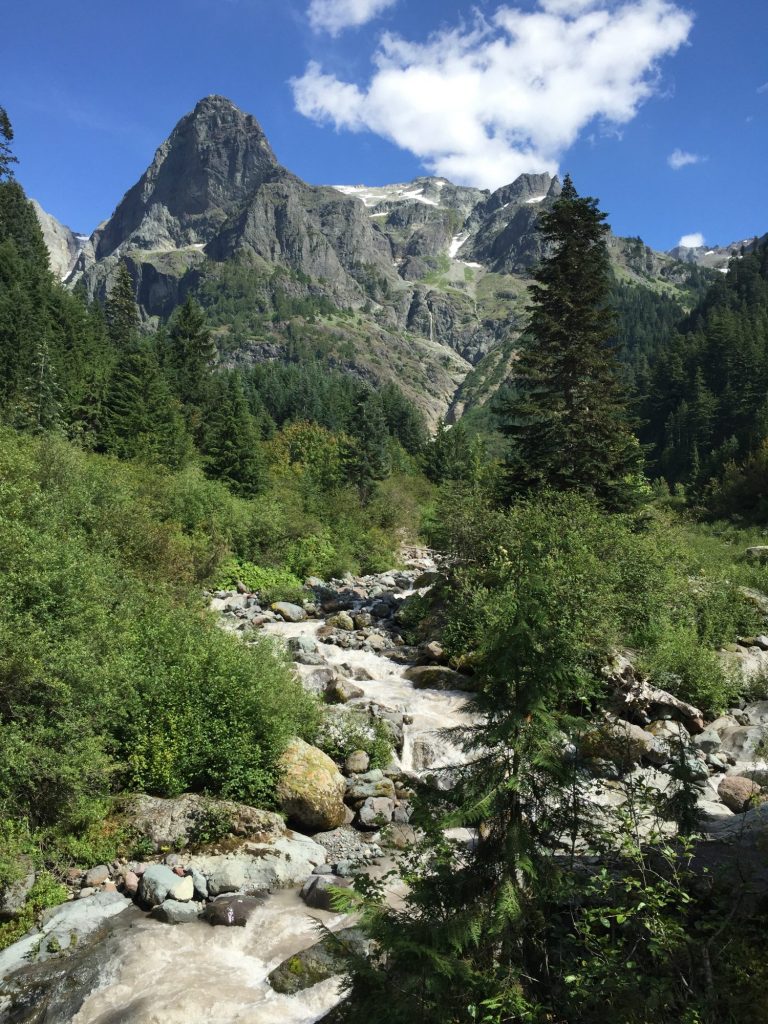
Granite Creek to Cataract Valley on Spray Park Trail (10.5 mi)
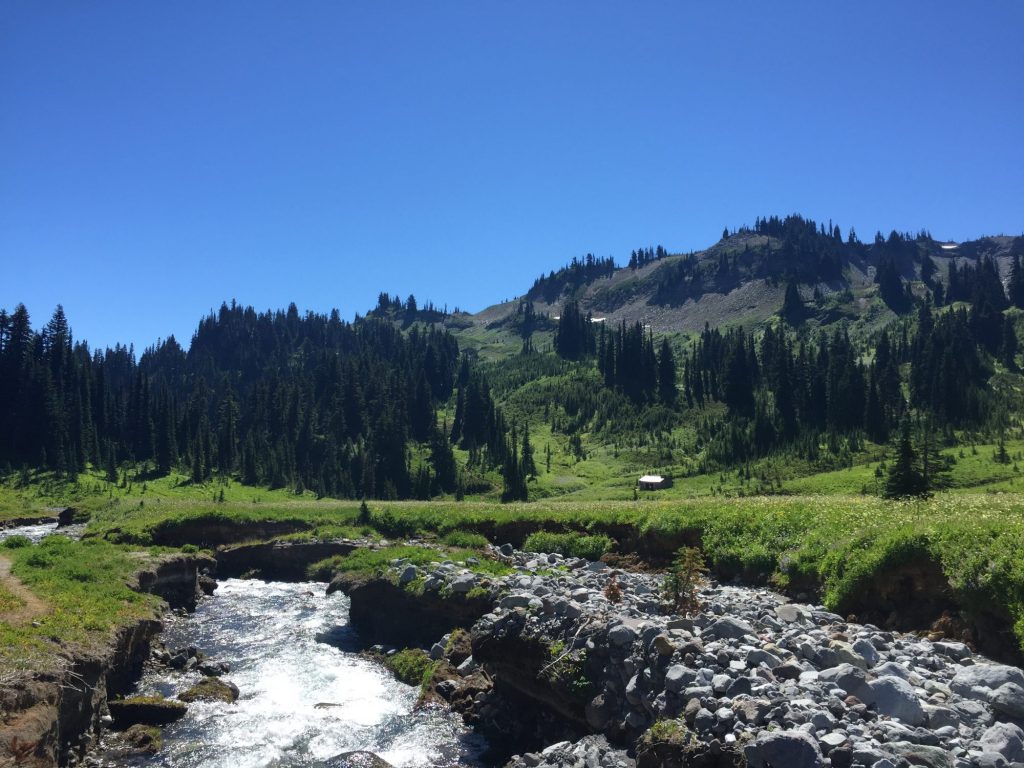
Passed Mystic Lake today around our mid-way point and soaked our feet in the cool water for a while. Passed trail crews working along the way. Also picked and snacked on cloudberries growing alongside the trail, what a delicious treat! We are taking the Spray Park trail as an alternative to the official Wonderland trail for this section as it is supposed to be more scenic. Cataract Valley camp was overbooked and pretty crowded (there were like 3 groups that had to share the group site) but we arrived early enough that we had a spot all to ourselves. It was very damp in the evening, I think we hiked into and camped right in the middle of a fog layer.
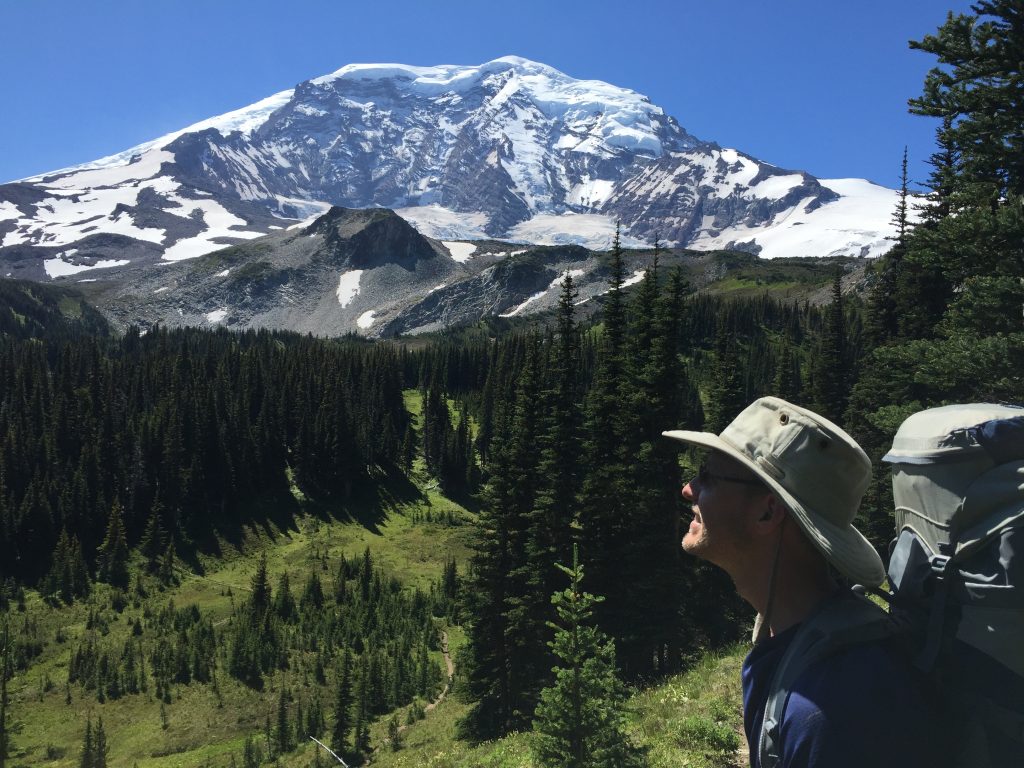
2016-08-10 12.13.352016-08-10 13.44.472016-08-10 14.35.05

Day 3
Cataract Valley to South Mowich River Camp (10.2 mi + 0.6 mi detour to Mowich Lake = 10.8 mi)
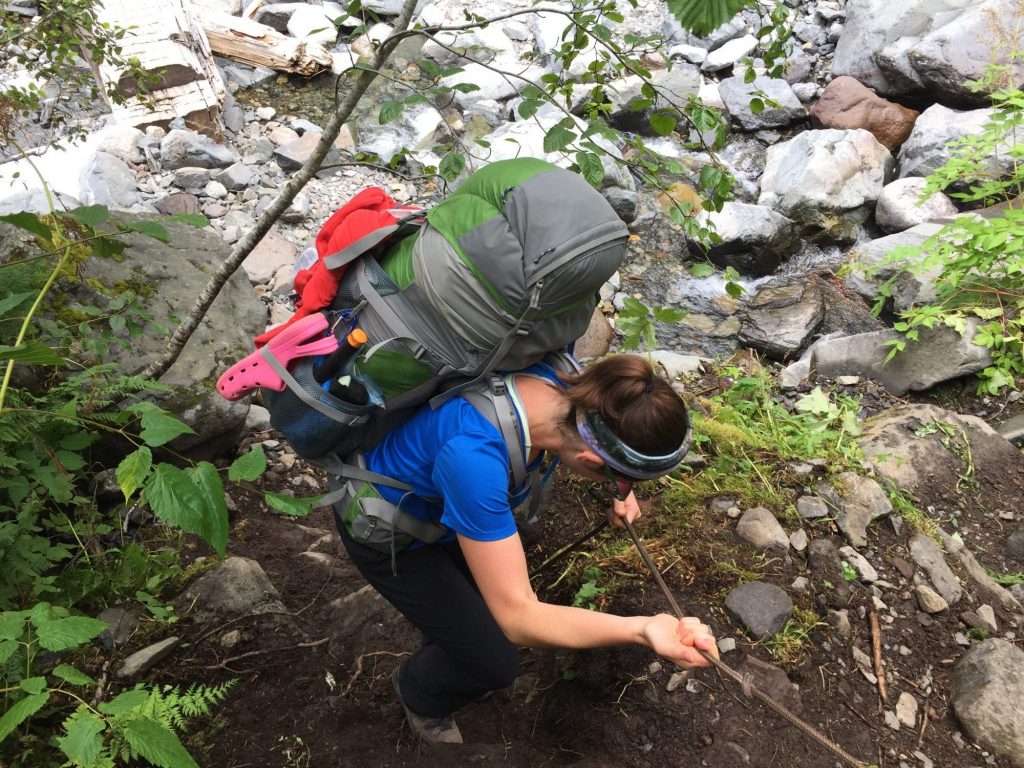
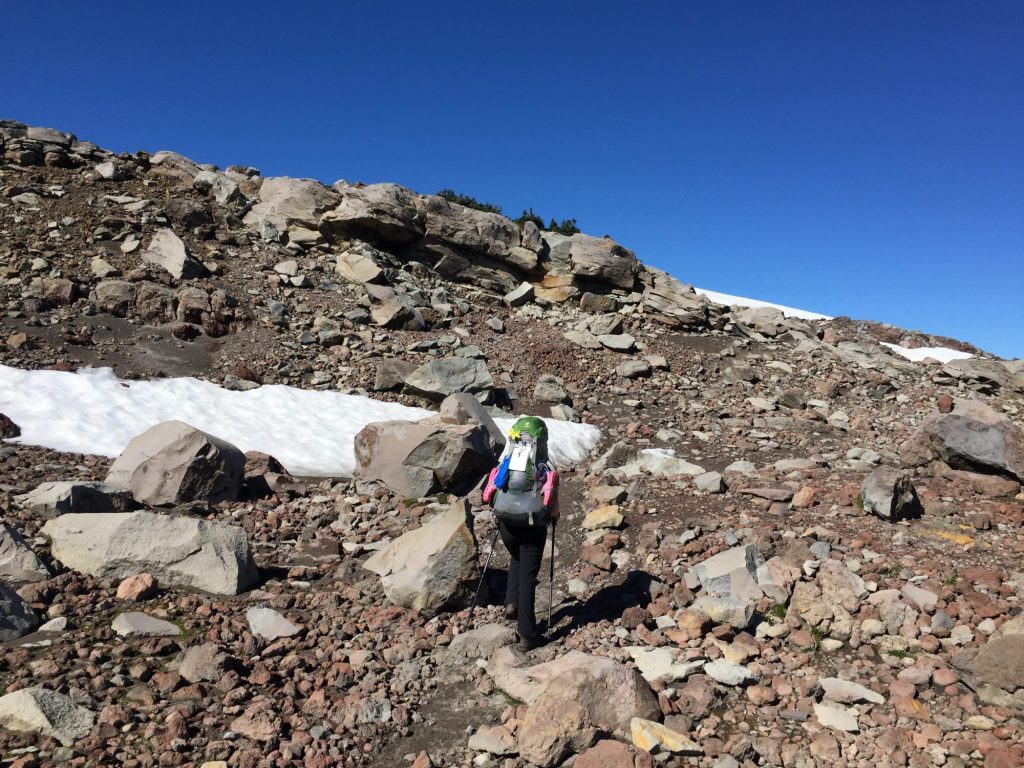
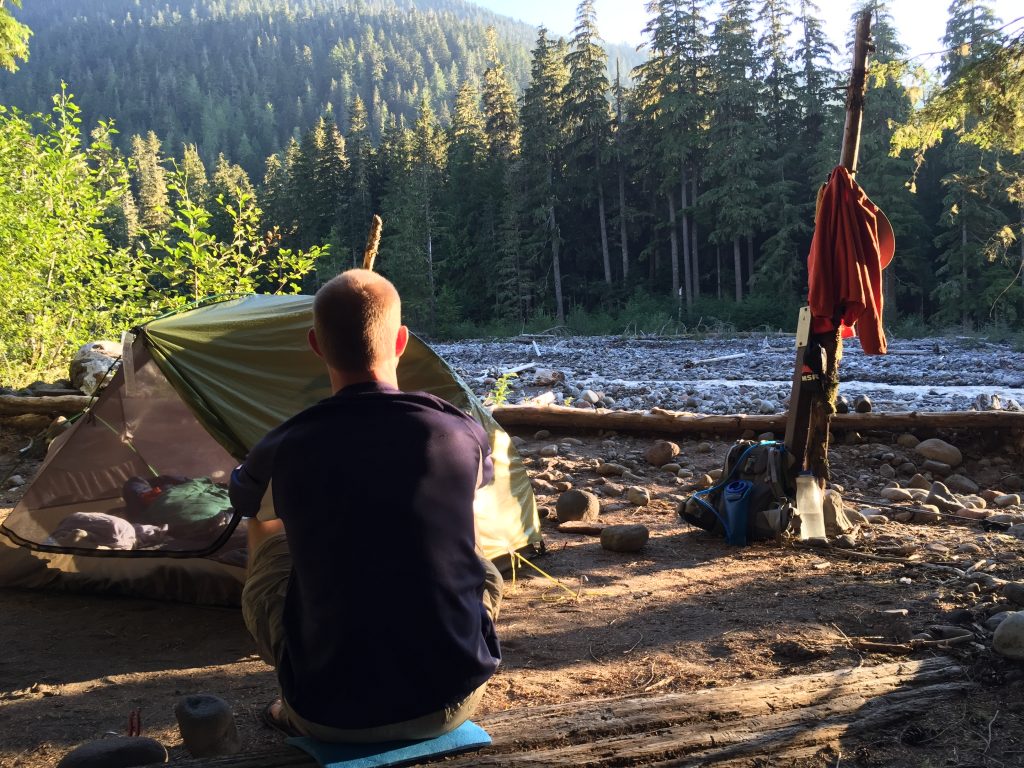
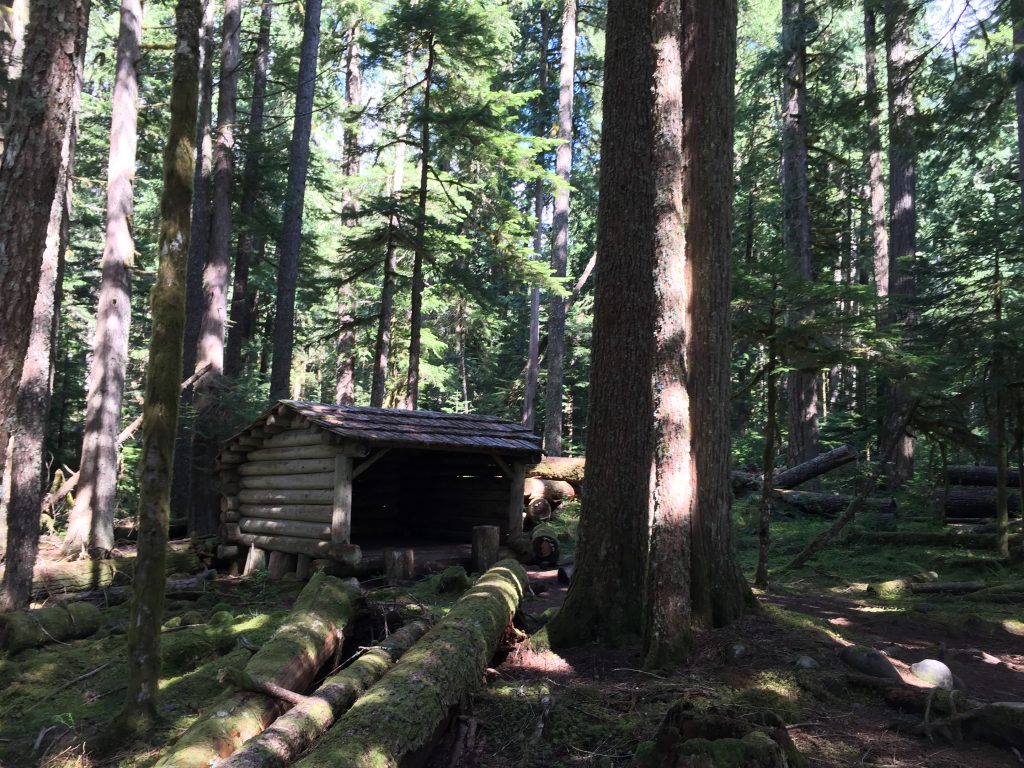
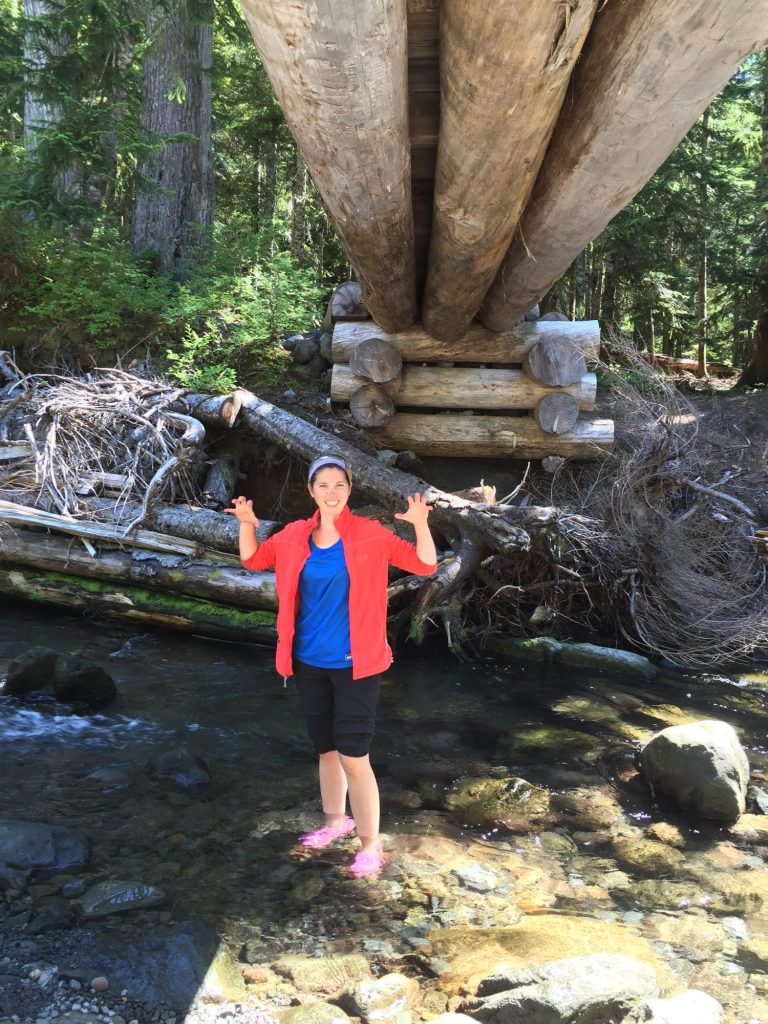
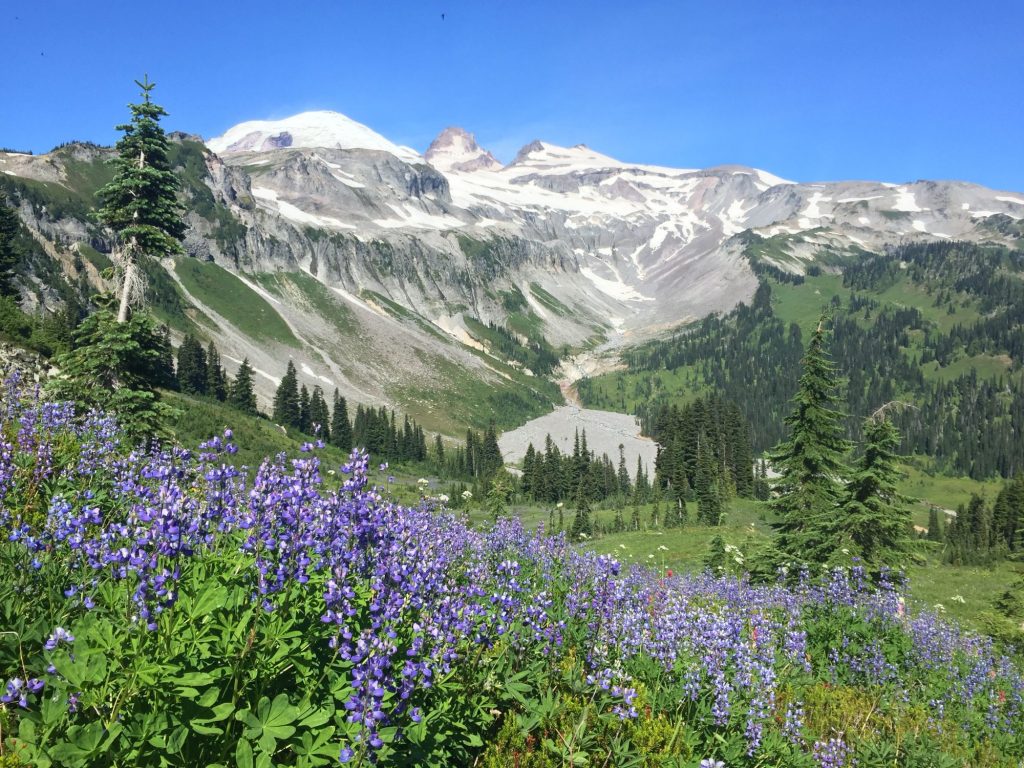
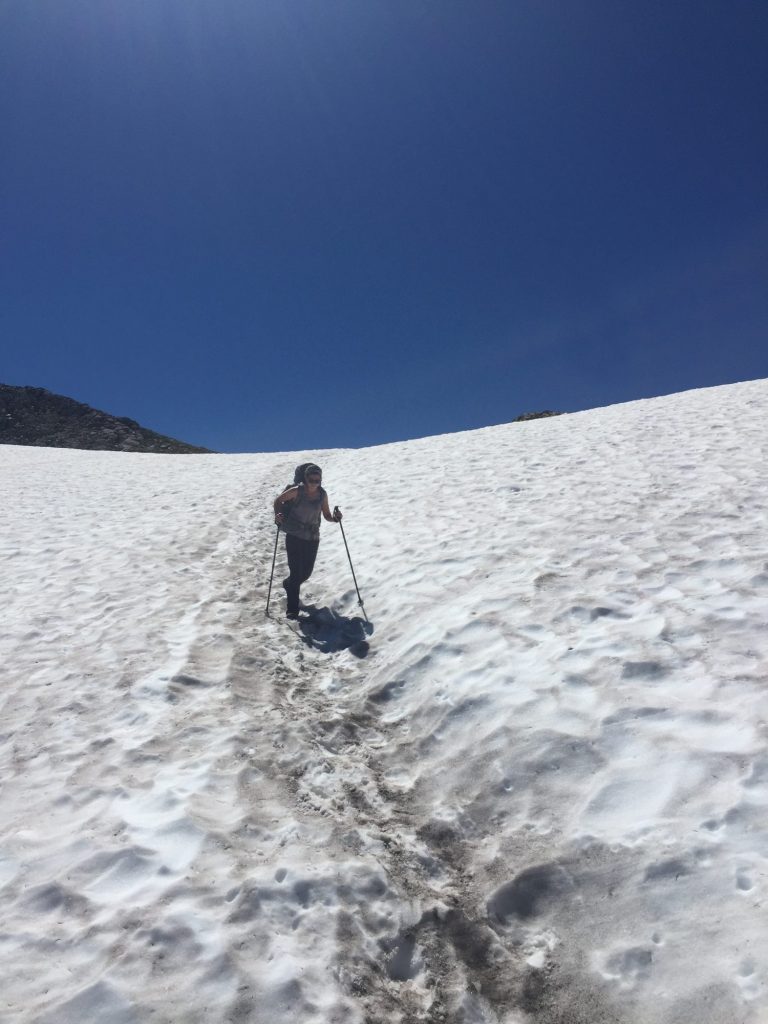
The meadows of Spray Park were amazing and filled with tons of mulitcolored wildflowers! Rainier was towering above us, overlooking the beautiful meadows. We crossed some snowfields here and climbed along talus slopes but nothing troublesome. The flies and mosquitoes were out with a vengeance today though! We made a detour up to Mowich Lake for water and extra toilet paper (the one thing I should have packed more of for this leg! – we have a roll waiting in our resupply cache). Made our way down to South Mowich River and got a great sandy camp site right on the river with lots of sunshine. We were able to dry out all of our damp stuff from camping in the cloud at Cataract Valley. South Mowich River camp has a neat little shelter, but the weather was so incredible no one had to use it. We scooped up some river water in a gallon ziplock and took our first ziplock bath of the trip, washed our sweaty socks, dried out in the sun, and enjoyed the rushing sounds of the river 🙂
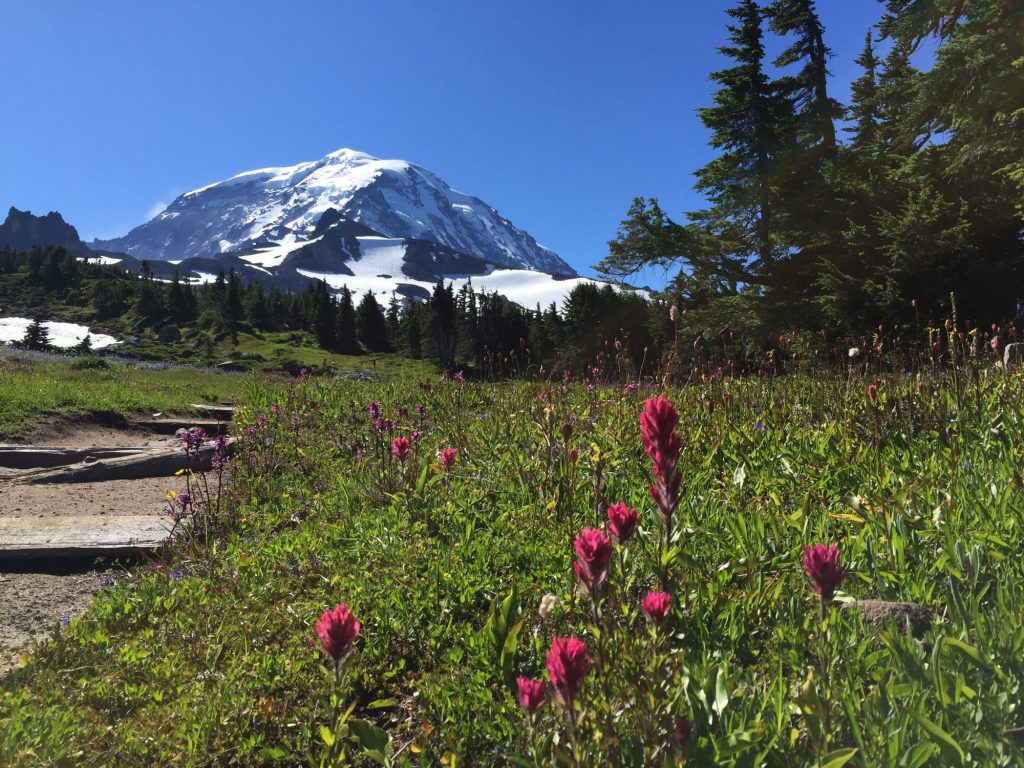
2016-08-11 10.31.03 2016-08-11 10.13.222016-08-11 19.13.402016-08-11 15.40.12

Day 4
South Mowich River Camp to North Puyallup River Camp (11 mi)
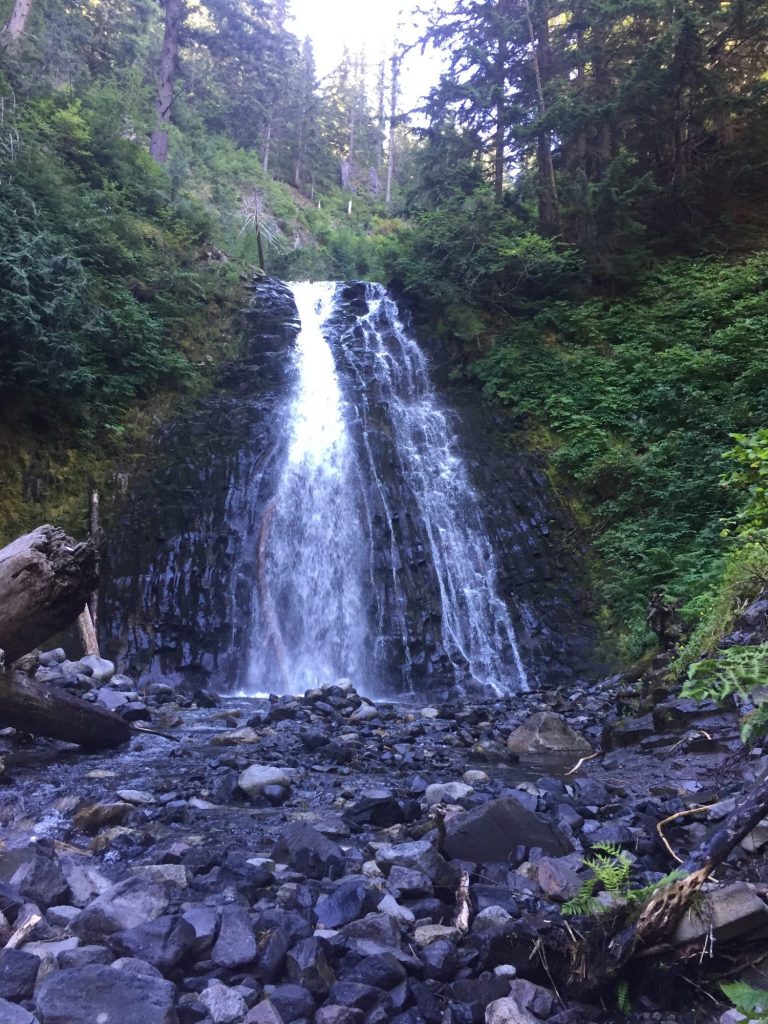
It was a long but gradual uphill hike to Golden Lakes where we stopped for water and lunch. Got to camp around 2 pm and headed 0.1 miles down the trail to the bridge overlook on the North Puyallup River. What an amazing view! Stunning ridges and cascading waterfalls. We ate dinner on the rocks, admiring the view, and chatted with a group of 4 from Seattle we had been leap-frogging with the last few days. We also found more cloudberries and wild mountain strawberries to snack on! Our favorite camp area thus far!
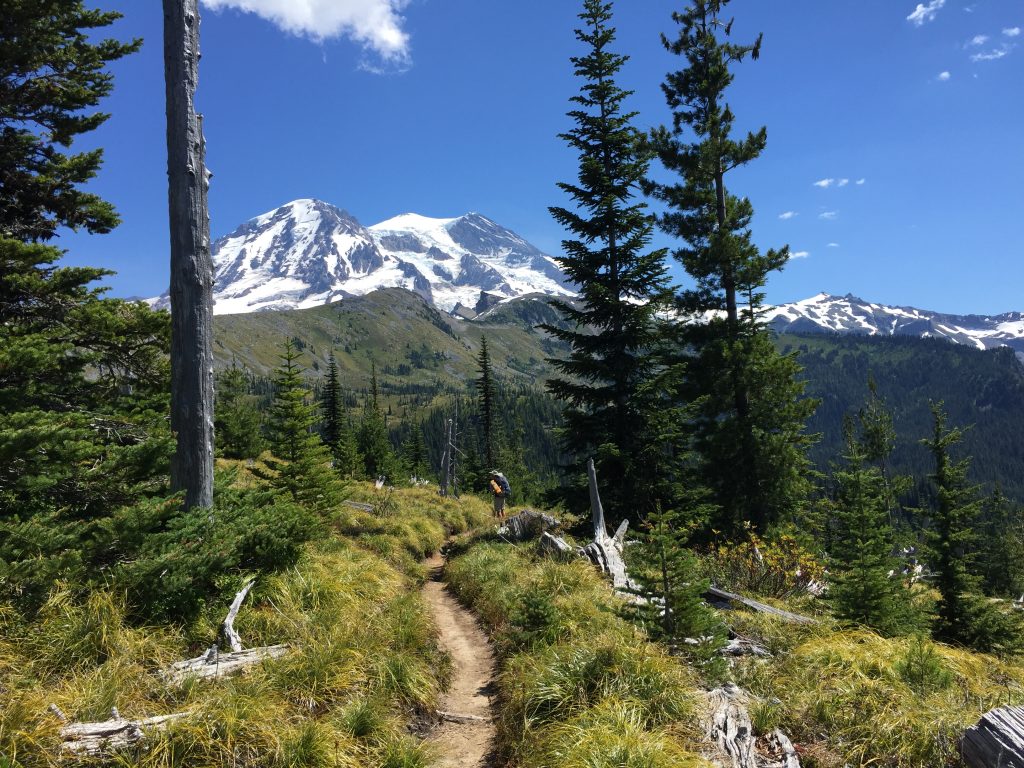
2016-08-12 12.50.592016-08-12 15.34.29

Day 5
North Puyallup River to Devils Dream Camp (13.5 mi)
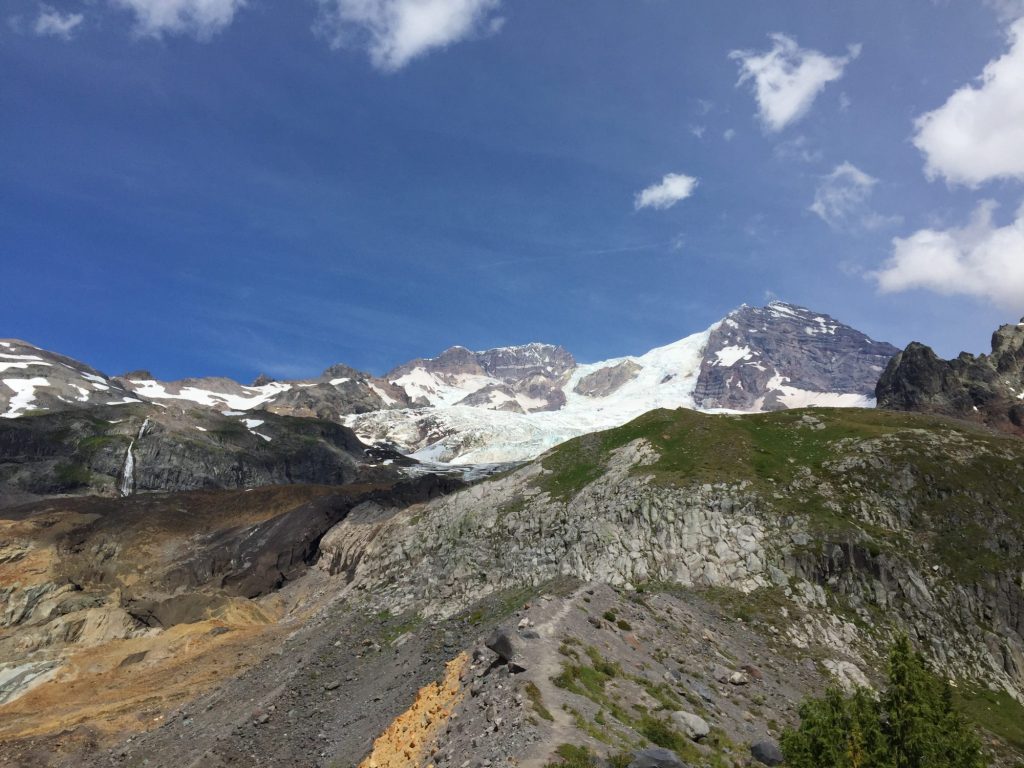
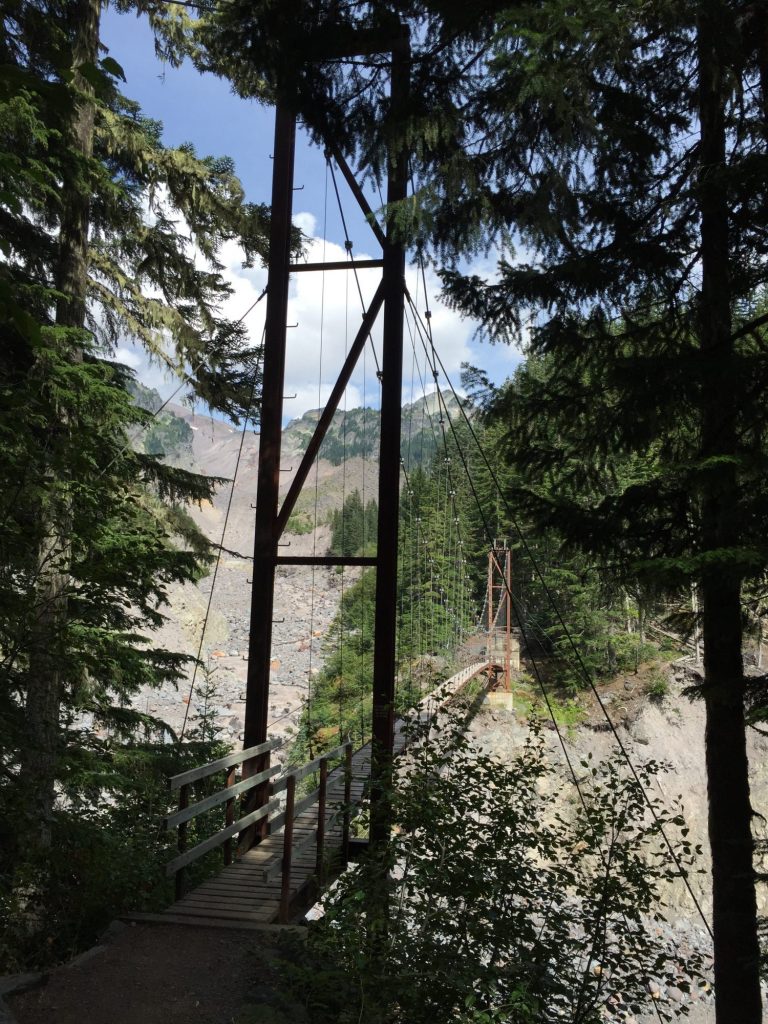
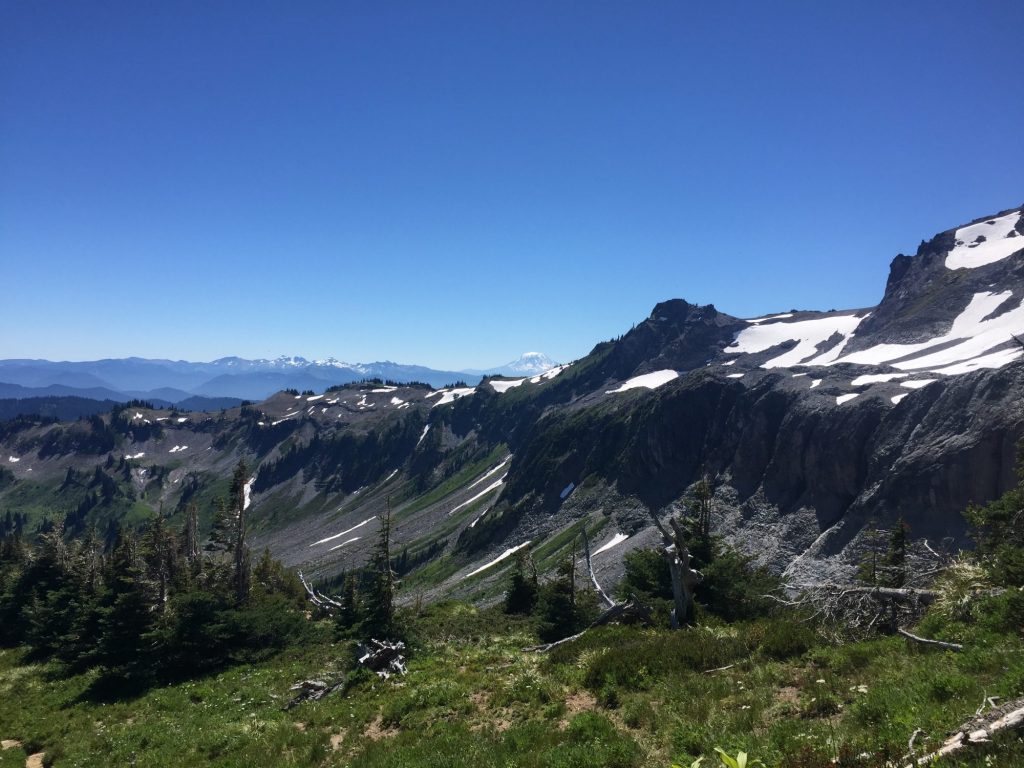
Killer day but some of the most outstanding views! After our morning climb to Klapatche Park (where we snacked on berries the whole way up) we took a pit stop and much needed swim at St. Andrews Lake. We didn’t bring swim suits, but trail traffic was pretty slow so we took turns being the lookout while the other went for a quick skinny-dip. We felt like whole new, fresh people afterward. The amount of sweat that has poured out of our bodies each day is baffling. It was a roller coaster of ups and downs today, and I was out of energy by the end of the day, but it was so worth it. Our favorite view was at the top of Emerald Ridge, where we finally got a sense of just how spectacularly massive and imposing Mt Rainier is. We could also really see the stunning blue tinge of color in the crevasses of the glaciers. Indian Henry’s was also really beautiful with meadows full of flowers – only wish we had admired it a bit longer, but it was nearing the end of our day and I was itching to be done. We arrived to camp pretty late for us, around 6 pm, and ate our much earned Chili Mac while swatting away at the mosquitoes. Devils Dream was a very buggy area.
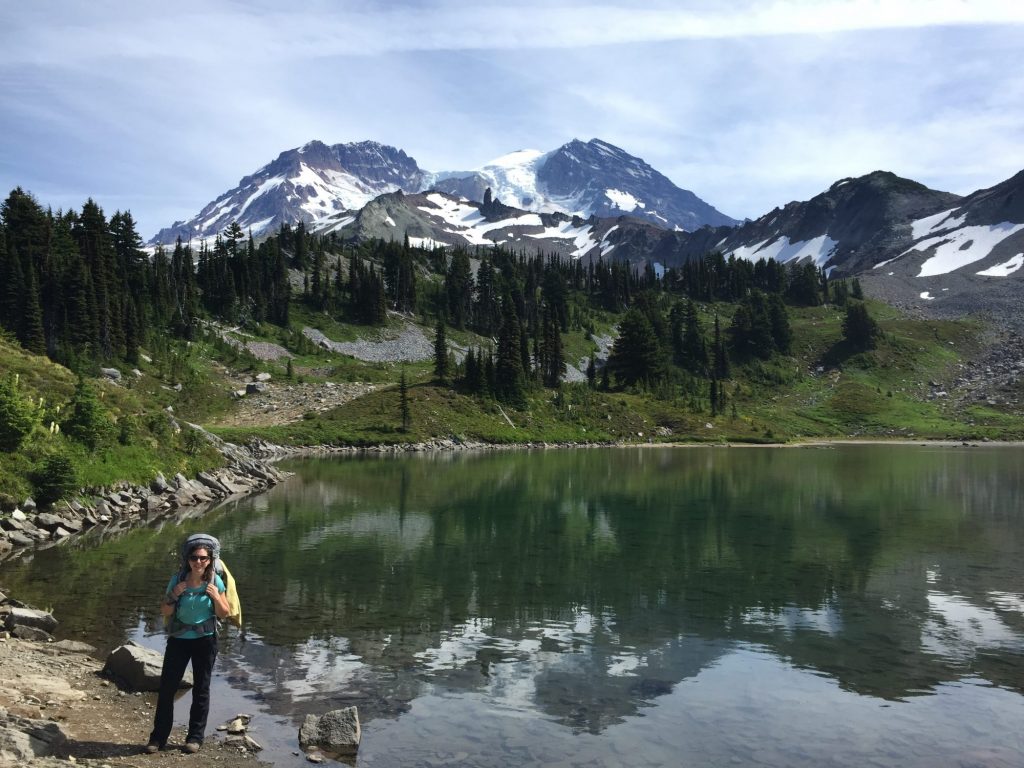
2016-08-13 11.25.122016-08-13 14.55.572016-08-13 16.04.42

Day 6
Devils Dream to Pyramid Creek Camp (2 mi)
Now this day almost broke us 🙂 Just kidding. To make our permit work, we had to do a short 2 mile day to Pyramid Creek. This actually worked out really well since we had a strenuous day yesterday, thus a short day proved to be a welcome break. It gave us a chance to rest and just enjoy our time admiring the view of Rainier from Pyramid Creek. Considering it was a whopping 2 mile day downhill, it would have been easy to do the Wonderland in 9 days instead of 10, but because of campsite availability, this is what we ended up with. We arrived in camp at 9:30 am (and that was after a leisurely breakfast at Devils Dream), hung our stinky clothes to air out (they needed it badly after 6 days of sweat accumulation), took another ziplock bath, ate lunch on the creek bank enjoying the view of Rainier, ate some wild black raspberries for dessert, took a nap, and played a few rounds of cards. It was a great, relaxing day!
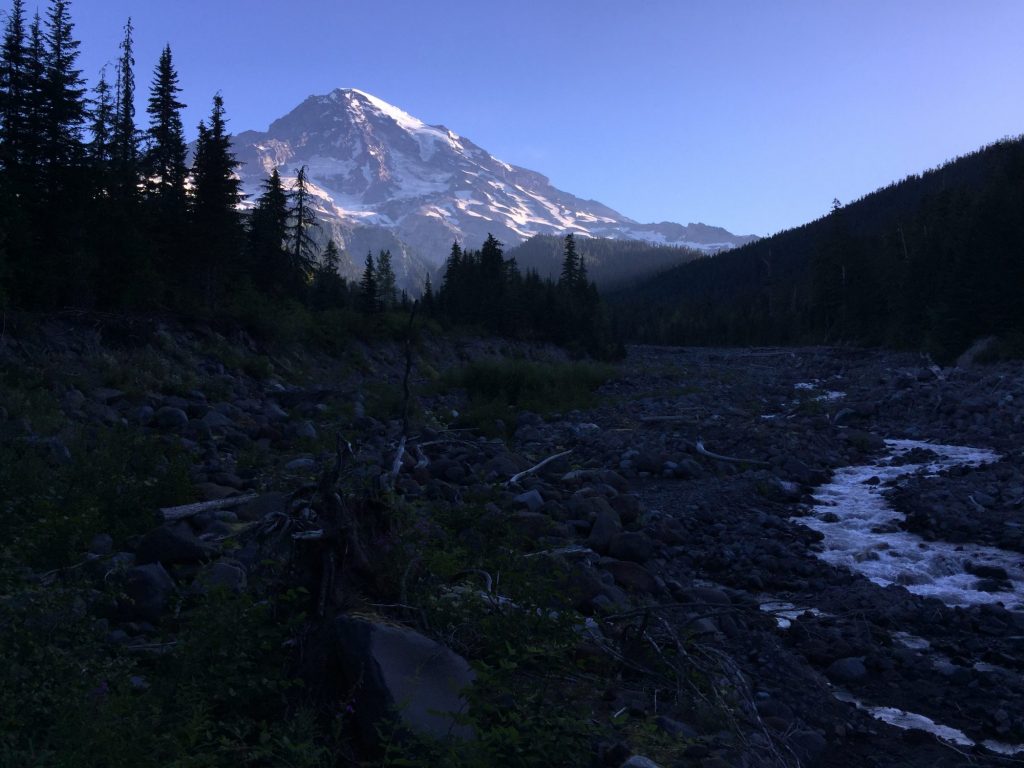
2016-08-15 07.48.22

Day 7
Pyramid Creek to Paradise River Camp (6.5 mi)
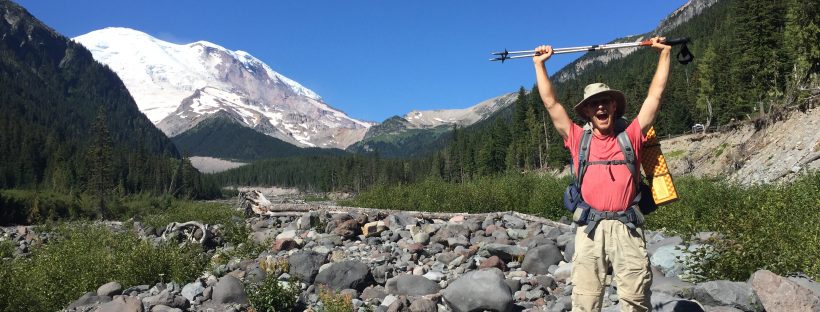
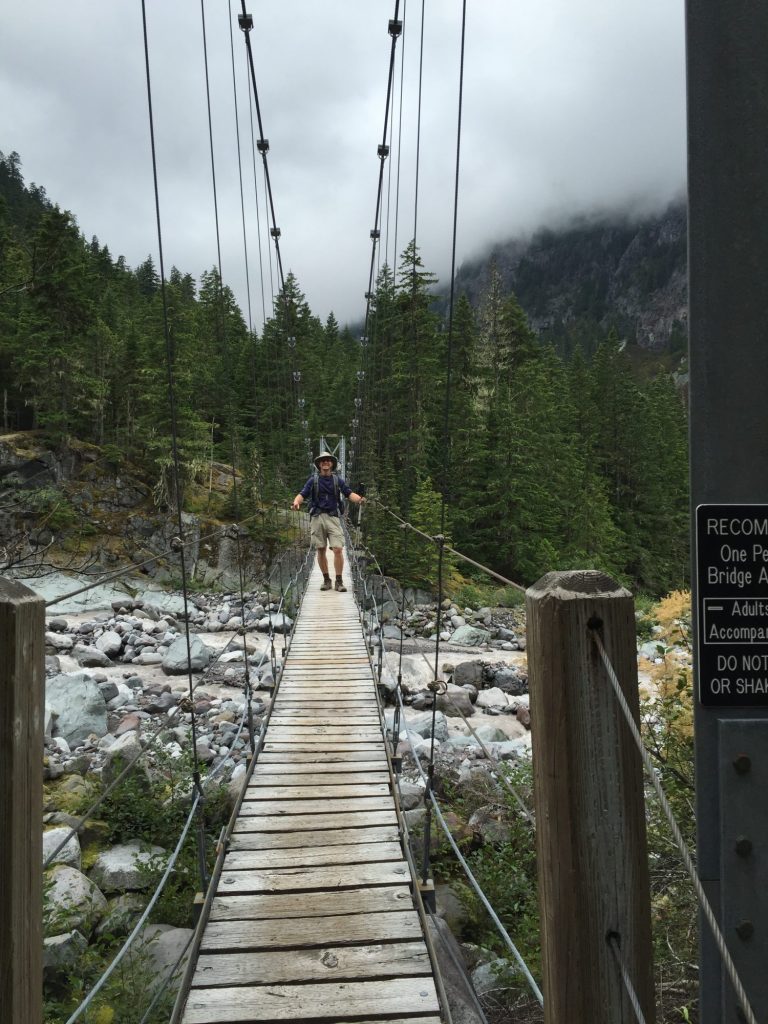
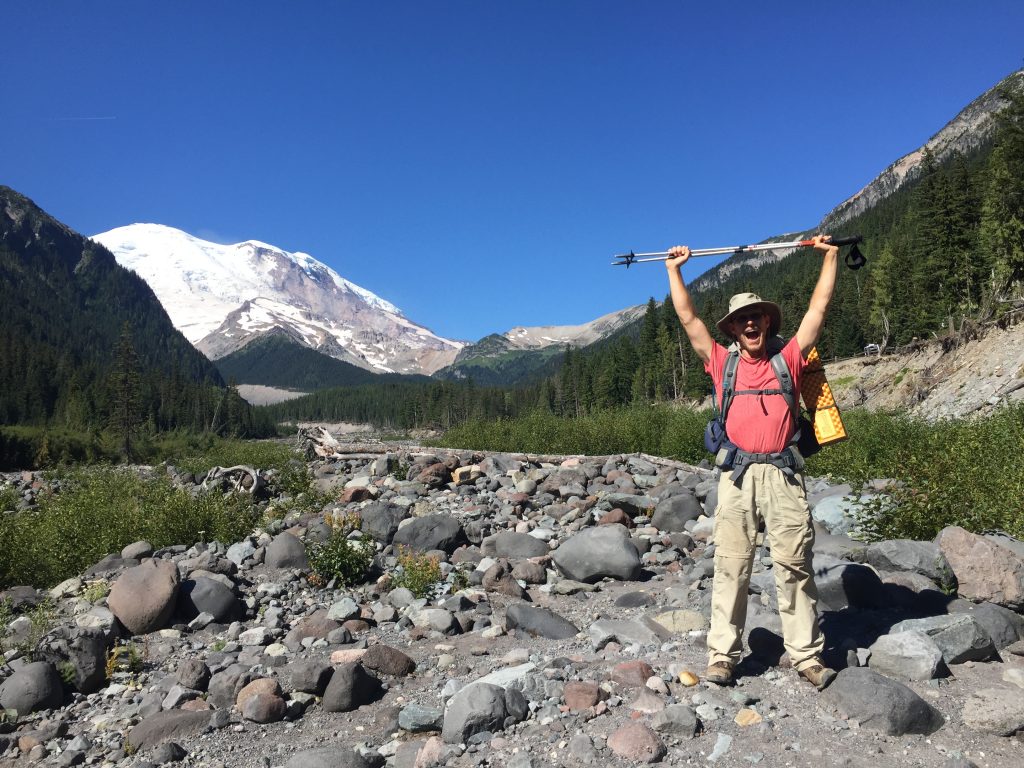
We were well rested and got an early start. Arrived at Longmire to pick up our food cache around 10 am – just in time that the Longmire National Park Inn Restaurant was still serving breakfast and we were craving some eggs! So we treated ourselves to omelette breakfasts (technically it was 2nd breakfast, but we were still starving), which were delightful, and headed on our way. Hiked past Carter Falls which we visited on on our last trip to Rainier except this time we could actually see the mountain from the trail! We were the first to camp again, so we nabbed our spot and then went to play in the river. We had a celebratory “food cache day” dinner of pesto tortellini topped with tilapia in a marinara sauce. It was amazing! Some of the other hikers put cans of beer in their caches as celebratory treats 🙂
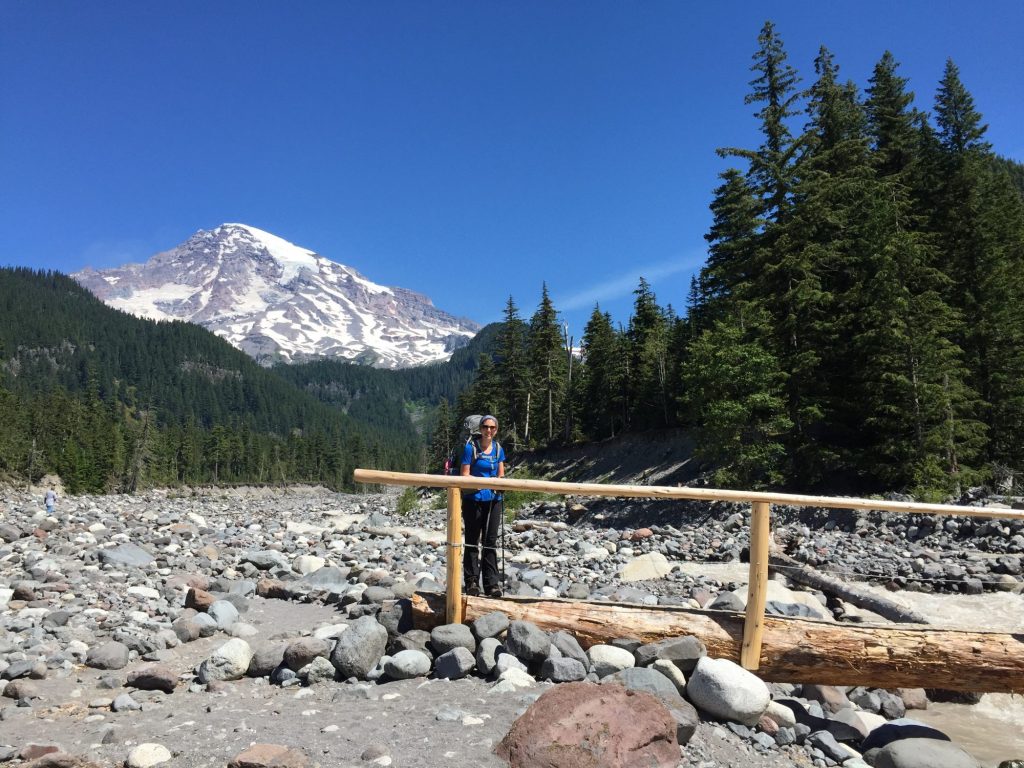
2016-08-15 12.05.47 2016-08-15 13.48.10

Day 8
Paradise River to Olallie Creek Camp (14.7 mi)
Olallie Creek Camp is actually located 1.3 miles off the Wonderland Trail on the Cowlitz Divide Trail, but all the campsites on the Wonderland near this area were filled up when we got our permit, so this was a great alternative. The scenery today was not that spectacular, mostly just hiking along river beds and forests, but the trail-side berries were abundant and we finally felt confident in our identification of huckleberries after talking to other hikers yesterday, so we started enjoying them too! We hiked past Reflection Lakes in the early morning and got some great pictures of Rainier mirrored in the still water. Olallie Creek camp was fabulous. It was literally right on the creek with a deep swimming hole just below our camp site. There were no other campers in the campground that night and we were surrounded by huckleberry bushes!
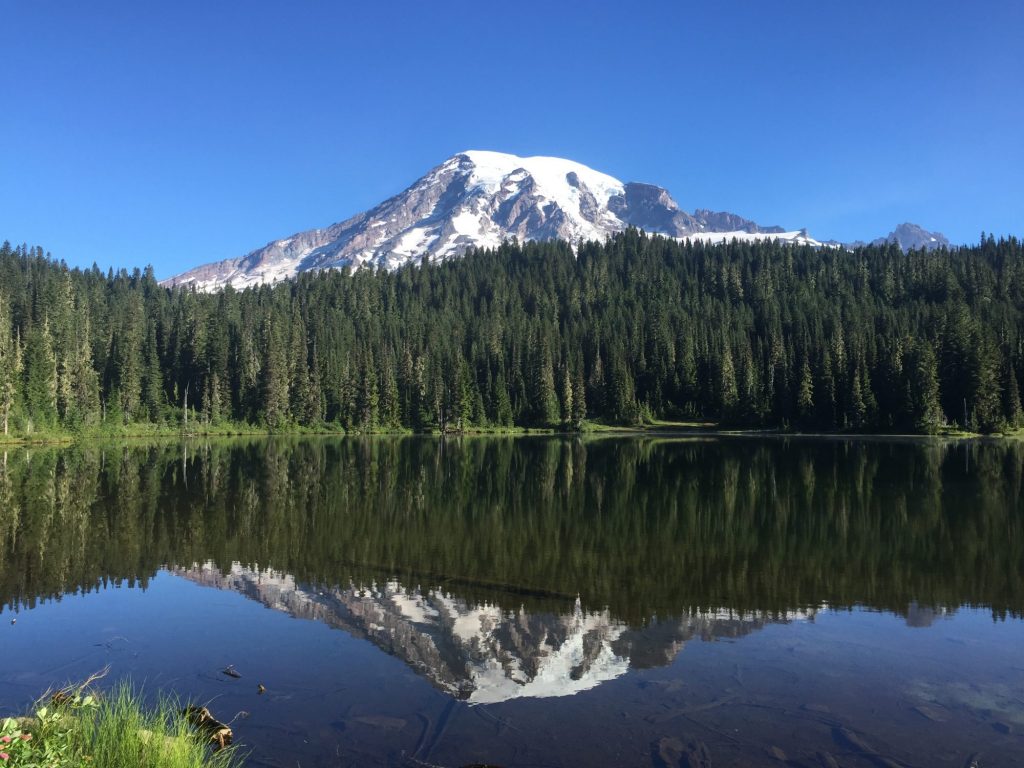
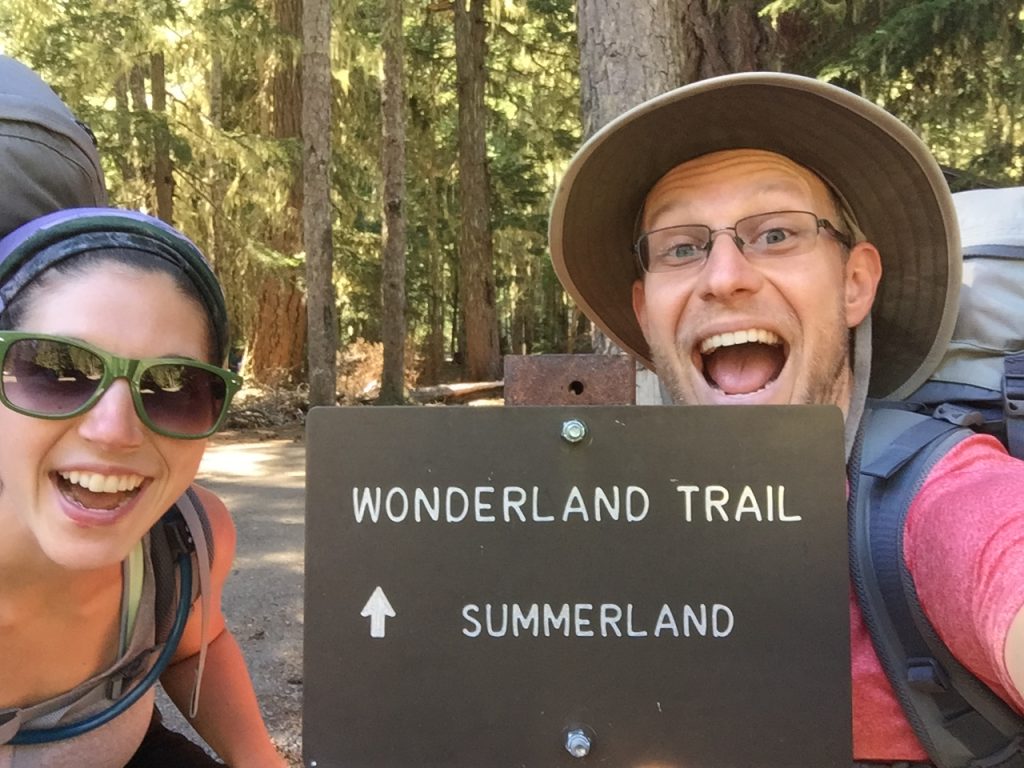
2016-08-16 08.11.102016-08-16 09.30.55

Day 9
Olallie Creek to Summerland (10.4 mi)
The surrounding huckleberries made a great addition to our morning oatmeal. We saw a black bear in a tree across the creek as we left camp in the early morning. He was enjoying some huckleberries too! 🙂 It was a day of continual climbing, but the views were so spectacular we hardly noticed the climb (well, that might not be entirely true, but this is my rosey retrospect). It was definitely some of the best scenery of the entire route. Working our way along a ridge for most of the day, we saw incredible views of Mt Adams and Mt Hood in the distance. We took a break at Indian Bar, which is the camp located in a huge bowl shaped basin with the Ohanapecosh River running through it. Some of the most stunning wildflower displays of the trip were here as well. I used the pit toilet at Indian Bar which had the best view of any backcountry pit toilet yet! It had views of the wildflower meadows, the cascades tumbling down the cliffs at the head of the basin, and the crown of Mount Rainier above it all. A “throne” indeed! From Indian Bar and working toward Summerland we rested atop the Panhandle Gap (the highest point on the trail at 6,901′). Summerland camp was stunning and we had views of Rainier out our tent as well as a marmot and ptarmegan for neighbors. A spectacular place to spend our last night and an amazing finale to the trip!
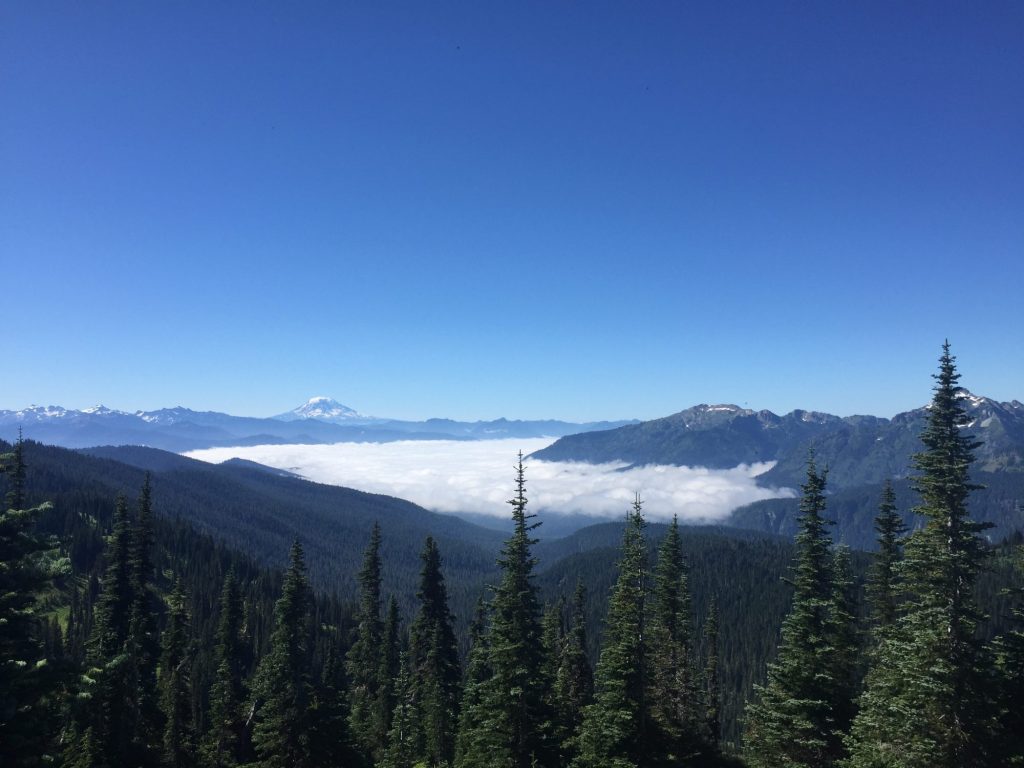
2016-08-17 10.08.29 2016-08-17 10.56.50 2016-08-17 13.04.56 2016-08-17 12.02.22 2016-08-17 13.21.29

Day 10
Summerland to White River Campground (6.7 mi)
And incredibly easy day of working our way down. We were back to the RV by 10:30 am. The trail was amazing and definitely full of wonders! Drove down to Longmire to pick up our empty cache bucket before heading out of the park.2016-08-18 06.10.26 2016-08-18 10.37.30 2016-08-18 10.41.07

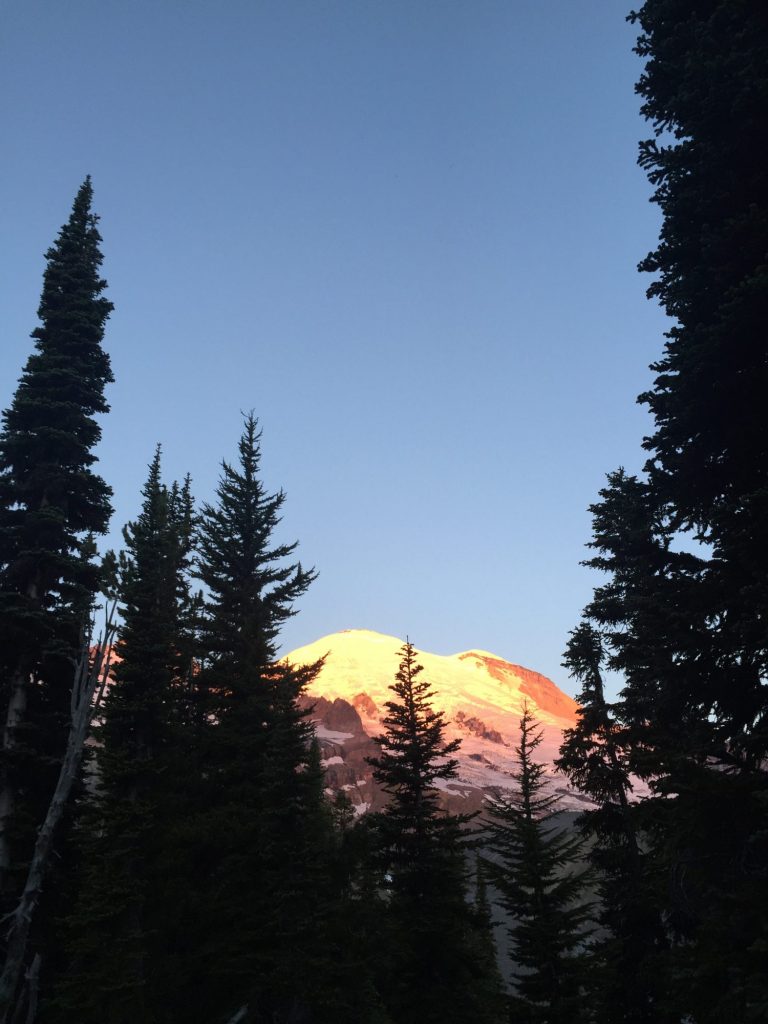
So there you have it! The trail was amazing and definitely recommended. There aren’t enough adjectives to describe what you see and pictures fail miserably at capturing just how captivating and mesmerizing this landscape is, so you’ll just have to go see for yourself :).  If you do have plans to hike the Wonderland yourself here are some of our top recommendations:

Most Scenic Camp Sites:

  • South Mowich River
  • North Puyallup
  • Klapatche
  • Indian Bar
  • Summerland

Favorite Views:

  • Skyscraper Pass
  • Spray Park
  • Klapatche Park
  • St Andrews Park
  • Emerald Ridge
  • Indian Henrys
  • Indian Bar Area
  • Panhandle Gap
  • Summerland Area

10 Days on the Wonderland Trail – Part 1: The Logistics

I was immediately intrigued by the idea of backpacking the Wonderland Trail when I started researching trails to hike in Mount Rainier National Park back in April. It sounded like an amazing undertaking, but I figured, what with having to get an advanced permit and all, that this would be another trail added to our future to-do list (which only seems to grow after visiting places). Then, after spending 4 captivating days in Mount Rainier at the beginning of July, my desire only grew and I began looking in to the venture further. There is just something about Mt Rainier and its massive, majestic beauty, that pulls you in and calls to your spirit of adventure.

For those of you who don’t know anything about the Wonderland Trail, here’s a little background. The Wonderland is a giant 93 mile loop trail that goes all the way around Mt Rainier. The many glaciers coming off the mountain have carved deep valleys and ridges, making the trail notorious for its tremendous elevation gains and losses. Due to these huge elevation changes, by the end of the journey you have cumulatively climbed 22,786 feet (and descended another 22,786′) and hiked the equivalent of 126 flat miles. That means that Wonderland Trail hikers do enough climbing to have climbed Mt Rainier 2-1/2 times (which stands at 14,410′ at it’s summit and climbers start at 5,359′). Now that’s a lot of climbing…Challenge accepted!

Normally, you have to apply for an advanced reservation to hike the Wonderland Trail, and these are getting increasingly harder to come by as the number of people who want to hike the trail grows each year. This year, however, the reservation system crashed and all permits are being given on a first-come-first-serve basis. This was perfect for us. We had the time and the flexibility to try and make it work! I had spent a good amount of time researching and planning, and most of my sources recommended doing the trip anywhere in 8-14 days, though 8 is pretty tough with long days and 14 is super leisurely with rest days included. We decided on a 10 day itinerary and it worked out great.

We were incredibly lucky, walking in to the White River Wilderness Information Center at 2pm on a Monday and getting a permit right off the bat. The trail was super busy (lots of locals are taking advantage of this first-come-first-serve opportunity as well) but it had been relentlessly raining the last 2 days and a lot of people were bailing. So there were enough openings at the backcountry camp sites to make an itinerary work! We ended up with a 10 day itinerary, starting at White River Campground and going counter-clockwise, which according to some sources is harder, but Matthew and I have concluded that either way you go is pretty hard and it’s the same amount of up and down either way. Some sections may be easier going clockwise, but then again some sections were easier going counter-clockwise. We were ecstatic with how well our direction worked for us. We had a good warm-up first day but not too strenuous. Our last night on the trail was filled with some of the most magnificent scenery, and our last day was a very easy day of down for a good way to finish. So in our opinion, starting at the White River Campground trailhead and going counter-clockwise is the best way to go. 🙂

One of the the really cool things about the Wonderland Trail is that you can cache food at certain locations around the trail. With a 10 day itinerary, we decided to take advantage of only one cache location, and that was at Longmire. We arrived at Longmire during our 7th day on the trail, so we carried 6-1/2 days of food with us for the first leg, and then picked up our cache full of the remaining 3-1/2 days worth of food supplies. You can take advantage of more cache locations (Mowich Lake, White River, Sunset) and carry less food which means less pack weight, but it would have taken us forever to drive around to the multiple locations to drop off the caches, so we decided carrying more in our packs was a better option for us.

A few quick additional thoughts about the trail:
If you’re looking for complete solitude and seclusion, this isn’t the trail for you. It’s relatively busy and you’re not likely to have a campground to yourself. While caching food is readily available about the trail, this does mean you’ll be sharing the path with many day-hikers during these sections in addition to other backpackers.
However, since you have to stay in designated backcountry campsites, you don’t have to worry about trying to find somewhere to pitch your tent or hang your hammock each night. Additionally, each campground provides the convenience of a pit or composting toilet and a bear pole for nightly food storage. Quite nice for planning purposes!

Planning and preparation completed, check out the details of the hike itself here….

Free Ultra-Light Camping Stove

I have at least 6 camping stoves, collected over the years (or hand-me-downs). Two of them see frequent use while the others sit in storage, forgotten. And yet I want even more. I visit every camping section I can and check out the stoves, seeing what the next “must have” is. I finally found a way to satisfy this itch without breaking my already cracked piggy bank.

Alcohol Stoves

Alcohol fumes are flammable. Vaporized alcohol (in gas form) is more flammable. These two simple facts are the guiding principles behind alcohol stoves. Pour the alcohol (fuel) into an alcohol stove. The fumes are lit, which causes the liquid to heat up and then begin to boil. Boiling vaporizes the liquid and causes the flames to burn at a hotter temperature.

Make Your Own!

There are many designs for alcohol stoves, designed to work better in different circumstances or be easier to build. This one is my current favorite, as it is easy to build, does not require a pot-stand and best of all, the materials are free! I have made this one using only my Swiss Army Knife and P-38. This means that if something happens to it during a camping trip, I can make a new one on the spot.

Materials

  • 1 aluminum soda can

Tools

  • cutting tool (sharp knife, scissors, razor blade)
  • pointy tool (push-pin, nail, ice pick)
  • marking tool (permanent parker)
  • measuring tool (ruler, tape measure)
  • smoothing tool (file, sand paper)
  • opening tool (can opener)
  • safety tools (gloves & safety goggles)

Disclaimer
You will be using sharp objects to make something that contains flammable liquids & burns… Be careful! I am in no way responsible for any injuries you inflict upon yourself.

Directions

  1. Prepare an aluminum soda can by emptying it’s contents and then rinsing it out thoroughly. (Here comes the free part!) Not a big soda drinker, I picked up enough cans walking down the road to make more stoves than I could ever possibly use. (I am sure to wash them out very well, and the flames take care of the rest!)
    If you would like a “prettier” stove, simply sand the paint off of the can. The easiest way that I have found to do this is to sand it off before the can is opened, so the pressure inside gives you something to push against. Since I am using pre-emptied cans, I have thought about filling it with water and then freezing it, but have not yet tried this method.
  2. Using your pointy tool (I prefer a push pin, though I’ve used the can opener on my Swiss Army Knife), poke 4 SMALL holes in the upper lip of your can, spaced every 90 degrees. These will allow the fuel to flow evenly while burning.
    They didn’t show up really well in the photos I took, but you want the holes evenly spaced around the rim of the can. I used the pushpin in the photo to make my holes, after marking their spots with the marker.
  3. Using your opening tool (can opener from kitchen or P-38), remove the inside top of the can. This stage can be a bit tricky and involve wiggling the opening tool to get a good bite. Be careful about burrs and sharp edges!
  4. Use the handle of your cutting tool to flatten/remove any burrs made by the pointy and opening tools.
  5. Draw a circle around the can 1″ from the bottom. Draw another circle around the can 2″ from the top. (This involves both the marking and measuring tools!) Generally, I lay the marker on a book to achieve the proper height, then spin the can to get an even ring drawn on it. Make sure your can stays flat the whole time, or your circle will look funny!
    Don’t forget to flip the can over when you are measuring the 2″ from the top, otherwise you will end up with a funny drawing on your can when you just measure 1″ and then 2″ from the bottom.
  6. Cut in-between these two lines. It can be messy, as you are in-between the lines.
  7. Cut the bottom line. It doesn’t have to be level, but it does need to be nice and smooth. (Some find this to be easiest with scissors, though I generally use my pocket knife.) Make sure there are no nicks or slivers to injure yourself on!
  8. Cut the top line. Again, it needs to be nice and smooth, and this time it needs to be level as well since this is what your pot will be sitting on.
  9. Use your smoothing tool, smooth away any slivers and burrs that might exist.
  10. Make a “wrinkle” or “dent” in the top portion, from the bottom edge up to the beginning of the upper lip. Be careful not to crease the can! You can use needle-nosed pliers, a pen or a dowel. I use my fingers, since I always have them handy! You don’t want these wrinkles to be too big or two wide. Be careful not to crease the can.
  11. Make 5-7 more of these wrinkles.
  12. Carefully insert the top portion INTO the bottom portion.

CONGRATULATIONS!

You just made an alcohol stove! Now let’s put it to use…

  1. Only use OUTSIDE, on a level surface, in safe conditions. Do not leave unattended!
  2. Pour fuel (70% Isopropyl Alcohol) so that it just covers the dome in the bottom of the can.
  3. Be sure no fuel is on your hands.
  4. Light using a long match or a long BBQ lighter.
  5. Wait for the outside edges to start flaming (you’ll know it when you see it!) Normally between 15-30 seconds.
  6. The first time you use the stove, just let it burn itself out, without a pot on it. The plastic in the paint needs to be burned off.
  7. Let the stove cool completely before refilling it.
  8. When re-lit, place pot carefully on the stove, making sure that it is centered.
  9. DO NOT STIR your pot when it is on top of the stove, as it is very easy to overturn this stove. That would pour flaming liquid everywhere… never a good idea.
  10. To put out the stove, either place an upside-down can over it to cut off oxygen, or simply wait for it to burn itself out. If you have a pot on top of the stove, you can sometimes blow the flame out.

Fuel

Just where does one get this magical liquid that makes this whole project possible? Any number of places, actually… You can use HEET from a gas station, denatured alcohol from the paint section of a hardware store (I bought mine at Wal-Mart), or any number of other fuels. Drinking alcohol works well, but costs a bit more. Check out www.zenstoves.net for even more information about fuel and other types of stoves that you can make.

Tent-side Views – Photo

Did you like the campsite from Thursday? Today’s photos come from that same trip.

If you were inside the tent and looked out the window, here is what you would see:

Click to see full-sized.

[singlepic=75,320,240,,center]

And here is the same view in its full glory:

[singlepic=76,320,240,,center]

You might not be able to tell it at first glance. But you are looking at the trail leading away from the site. 😀 Head down the break in the trees and you will quickly be swallowed up by the forest, losing site of the site after about 15 feet. Isn’t it wonderful? We love it and can’t wait to go back!

Spectacular Campsite – Photo

Here is my wife and I’s favorite campsite in the Red River Gorge. It’s not always available, but this is frequently our goal when we head out to go camping. This is also the spot we normally picture when we think of camping. It is located out along a ridge, not far from the main trail. When the leaves are on the trees, it is invisible from the trail and can only be seen from the neighboring cliffs across the valley. As you can see, when the leaves are in full fall glory, it is an amazing place to camp!

Not only does this site hold our little dome tent perfectly, but there are some perfectly-spaced trees to hang our hammocks! We first tried a hammock in addition to our tent, and then returned with just our hammocks. With our bugnets in place and a slight breeze to rock us, we had a wonderful night’s sleep here!

Click to see full-sized.

[singlepic=60,320,240,,center]

Fresh Drinking Water – Photo

During the second week of our honeymoon, my wife and I returned to the Red River Gorge, in Daniel Boon National Forest, Kentucky. This park is where we were engaged and also where we were married. It seemed only fitting that we also visited for part of our honeymoon. A multi-day backpacking trip was in order! Along the way, we used our filter to get safe water. Is there any fresher water than some from a spring in the mountains? Nice and cool, definitely refreshing, I don’t think it gets much better than this!

Click to see full-sized.

[singlepic id=63 w=320 h=240 float=center]

Hiking Above the Clouds – Photo

This photo was taken shortly after Saturday’s. My wife (who had just become my fiance the night before) and I were walking back to our campsite in the Red River Gorge. We were on a ridge, above the clouds down in the valley. They were evaporating and the valley below us was beginning to emerge. Here you can see the forest slowly “waking up”.

Click to see full-sized.

[singlepic id=69 w=320 h=240 float=center]

Sitting Above the Clouds – Photo

Took this picture one morning in the Red River Gorge in Daniel Boon National Forest. My wife (girlfriend who became my fiance the night before) woke up early, walked down the trail a short way and sat on the cliff’s edge. We watched the clouds in the valley dissipate.

Click to see full-sized.

[singlepic id=57 w=320 h=240 float=center]

An Easy Way to Go Camping More Often

Do you like camping but don’t get to go often enough? Just can’t find the time to get away? Here’s some good news, you don’t have to! Grab your gear, set up in your yard and you can go camping any time. Have to be at work in the morning? Set the alarm on your cell phone, make coffee and breakfast on your stove before heading inside for a quick shower, then head off to work.

These backyard excursions can provide valuable experience. With shelter near at hand, you can test out new gear without fear. New stove or type of food? Go in and rummage through the kitchen if it doesn’t work out. Want to see how well your gear stands up to the rain or cold? Go test it! If you get wet or cold, go inside.

There is no worse time to find out your gear isn’t working than when you’re out in the field, relying on it. Can you set up your tent quickly, even in the wind? What about taking it down during a lull in the rain? Being able to do so has saved my wife and I from getting thoroughly drenched a couple of times; this is a skill that we honed with practice. Through testing at home, we know that we can sleep comfortably in our hammocks on a 35°F night. When sleeping in the tent, we know which of our pads are the most comfortable. Through practice, we know our favorite meals and how long it takes to prepare them. When you use your gear at home you can use it more often, testing it thoroughly and learning its quirks, which will enable you to have a safer and more enjoyable camping experience.

Don’t let time be an excuse anymore. You can have a great time camping, right in your own back yard. Literally!